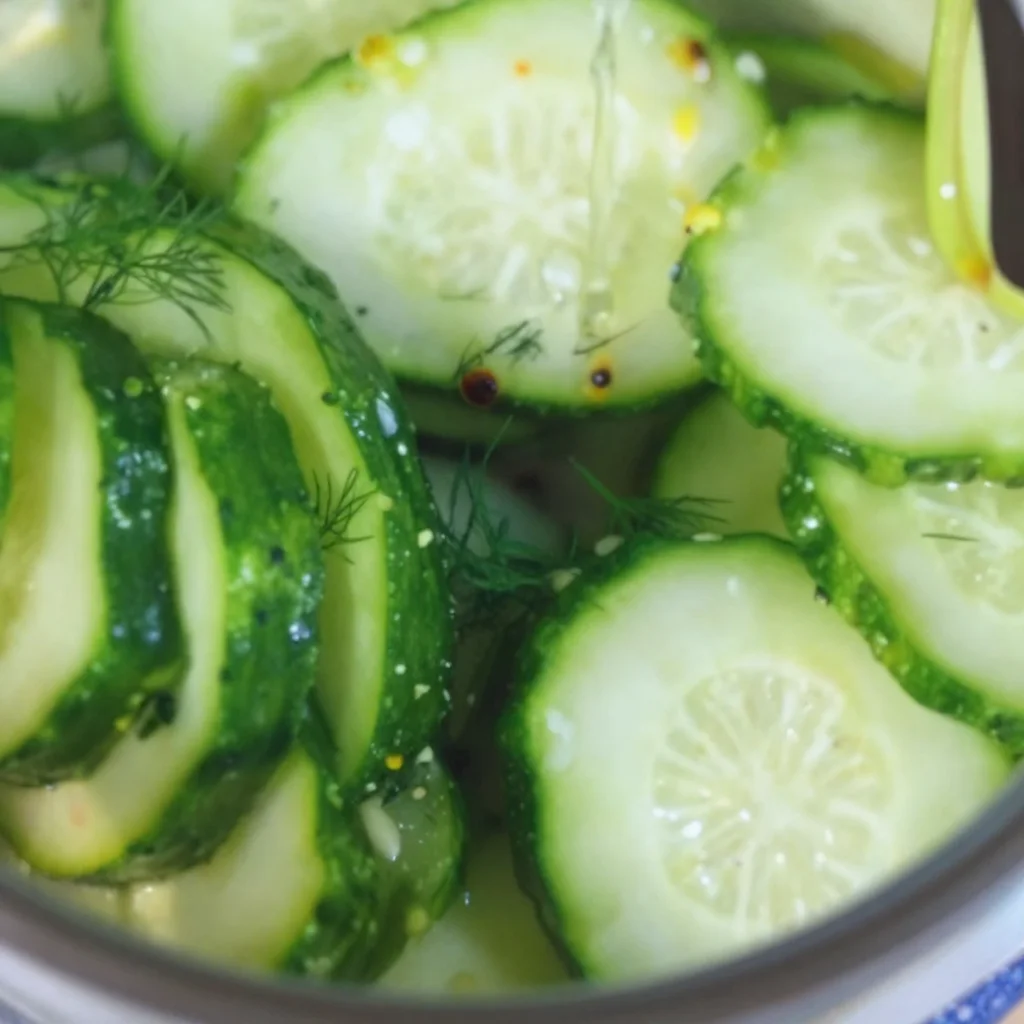
Homemade Refrigerator Dill Pickles
Hey there, my fellow food enthusiasts! Nina here, and today we’re diving into one of my absolute favorite culinary adventures: making homemade refrigerator dill pickles! If you’ve ever bitten into a crisp, tangy pickle that makes your taste buds sing, you know the delightful magic of these little green wonders. They’re perfect on sandwiches, as a snack, or just a tangy addition to your dinner plate. Plus, making them at home is a lot easier than you might think!
A Little Slice of Nostalgia
Growing up, my summers were filled with the scent of fresh cucumbers straight from my grandmother’s garden. I can still hear the gentle hum of bees buzzing around her flower beds and the laughter of my cousins splashing in the kiddie pool. But the real highlight was always the day we’d gather in her kitchen to make dill pickles. We’d wash the cucumbers, slice them up, and pack them into jars with loads of fresh dill and garlic. As a kid, I loved sneaking tastes of the cucumber slices, all while daydreaming about how I would eventually be the one making these pickles for my own friends and family.
Now, every time I pop open a jar of these homemade refrigerator dill pickles, it takes me back to those sun-kissed summer days filled with simple joys. So, let’s roll up our sleeves and make our own memories in the kitchen!
Ingredients
Here’s what you’ll need for this zesty pickle adventure:
-
Cucumbers:
- Choose firm, fresh ones (pickling cucumbers are the best!). If you don’t have pickling cucumbers on hand, English cucumbers work too. Just peel them if you prefer a softer skin!
-
Fresh Dill:
- The star of our show! This herb brings that unmistakable dill flavor. If you can’t find fresh dill, about 1-2 teaspoons of dill weed can work in a pinch, but fresh is always best for that vibrant taste!
-
Garlic Cloves:
- Use several cloves for loads of flavor! You can crush them for a stronger taste or leave them whole for a milder kick. If you’re garlic-averse, feel free to skip it!
-
Water:
- Use filtered water if possible! It really helps to enhance the taste of your pickles.
-
Vinegar:
- White vinegar works great for clear pickles, but you can also experiment with apple cider vinegar for a sweeter flavor.
-
Salt:
- Use kosher salt or pickling salt. Regular table salt can make your pickles cloudy. Plus, salt is what helps with pickling!
-
Sugar:
- A touch of sugar balances out the acidity in the pickling liquid. You can use white sugar, brown sugar, or even honey for a different nuance.
-
Peppercorns:
- These add a little bit of heat! Whole black peppercorns work best but feel free to mix in some red pepper flakes if you love a spicy kick.
Step-by-Step Instructions
Let’s get to the fun part! Here’s how to make these delightful pickles step by step.
1. Gather Your Ingredients
Make sure you have everything prepped and ready. I like to arrange my ingredients on the counter so I can see what I’m working with. It makes cooking a lot more enjoyable!
2. Prepare the Cucumbers
- Wash the cucumbers thoroughly under cold water.
- Slice them into spears or rounds—whatever shape you prefer! I love to do spears for that classic crunch.
Chef Tip: For an extra crunch, soak the cucumbers in ice water for about an hour before starting! It makes a world of difference.
3. Sterilize Your Jars
- To ensure your pickles last longer, you’ll want to sterilize your jars.
- You can do this by placing them in boiling water for about 10 minutes or running them through a dishwasher on a hot cycle.
4. Prepare the Brine
- In a pot, combine 1 cup of water, 1 cup of vinegar, 2 tablespoons of salt, and 1 tablespoon of sugar.
- Heat over medium heat, stirring until the salt and sugar dissolve. Then let the brine cool for a bit.
Chef Insight: The ratio of water to vinegar can be adjusted based on how tangy you like your pickles. More vinegar for tanginess, less for a smoother finish!
5. Assemble Your Jars
- Start layering your jars with cucumbers, garlic cloves, and fresh dill.
- Add a pinch of peppercorns between layers for nice distribution.
6. Pour in the Brine
- Once the brine has cooled, pour it over the cucumbers in your jars, making sure they’re fully submerged.
Chef Tip: Leave a little space at the top of the jar for expansion; this helps prevent messes!
7. Seal and Refrigerate
- Seal the jars tightly with lids and gave them a little shake to ensure everything is well mixed.
- Place them in the fridge for at least 24 hours before devouring. The longer they sit, the more flavorful they become!
Serving Suggestions
When it comes to serving your homemade refrigerator dill pickles, the options are practically endless! Here are a few ideas:
- On a Sandwich: Layer them on a grilled cheese or turkey sandwich for that perfect crunch.
- As a Snack: Serve them alongside cheese and crackers for a delightful afternoon snack.
- On a Charcuterie Board: They’re excellent additions to any cheese platter, adding a pop of color and flavor!
- With Burgers: Top off your favorite burger with these zesty pickles for a mouthwatering twist!
Recipe Variations
Feeling adventurous? Here are some creative twists and variations you can try:
- Spicy Dill Pickles: Add in slices of jalapeños or some red pepper flakes for an extra kick!
- Sweet Mustard Pickles: Mix in a tablespoon of mustard seeds for a tangy twist that brings out a unique flavor profile.
- Garlic Dill Pickles: For garlic lovers, double the amount of garlic cloves to really amp up that flavor!
- Zesty Lemon Pickles: Add slices of lemon to the brine to infuse a citrusy note that’s perfect for summer.
- Herb-Infused Pickles: Experiment with other herbs like thyme or coriander for a new flavor adventure.
Chef’s Notes
Making pickles is not just a cooking process; it’s a bonding experience! I remember the first time I made them alone, thinking of my grandma’s wise words: “Cooking is all about love, Nina.” The truth is, each jar holds a story, a memory from my family kitchen. I often find myself experimenting when I make these pickles—perhaps adding a new spice or swapping out an ingredient based on what’s in season.
One of my funniest pickle-making blunders happened when I accidentally used powdered garlic instead of fresh. The flavor was… interesting, to say the least! While the pickles still ended up being tasty, they didn’t quite have the same zing I was after.
FAQs and Troubleshooting
1. How long do homemade refrigerator pickles last?
Homemade refrigerator pickles can last up to 2-3 months in the fridge if properly sealed! Just ensure they’re always covered with brine for freshness.
2. Can I reuse the brine?
Yes, you can! Just remove half of the cucumbers and top off the jar with fresh cucumbers, simmer some more brine if you need to, and let them pickle again!
3. What should I do if my pickles are too salty?
If you find your pickles are overly salty, simply soak them in fresh water for an hour. This can help draw out some of the salt.
4. Why are my pickles not crunchy?
Make sure your cucumbers are fresh and try adding an extra tablespoon of pickling salt. Also, remember that soaking them in ice water before pickling helps maintain that coveted crunch!
Nutritional Info
While it can vary slightly based on the exact ingredients used, here’s a rough estimate for a serving size of 1 pickle:
- Calories: 10
- Total Fat: 0g
- Saturated Fat: 0g
- Sodium: 200mg
- Total Carbohydrates: 2g
- Dietary Fiber: 0g
- Sugars: 1g
- Protein: 0g
Now that you’re armed with all the tips and tricks to make delicious homemade refrigerator dill pickles, I can’t wait for you to try it out! Trust me, there’s nothing quite like the crunch and flavor that comes from a jar you made yourself. So gather your ingredients, channel your inner pickle-making pro, and let’s create something truly scrumptious!
Here’s to crafting memories and enjoying the flavors of home. Happy pickling, my friends! 🍯💕
PrintHomemade Refrigerator Dill Pickles
Delicious and crisp homemade refrigerator dill pickles that make for a perfect snack or addition to any meal.
- Prep Time: 15 minutes
- Cook Time: 15 minutes
- Total Time: 30 minutes
- Yield: 4 servings 1x
- Category: Condiment
- Method: Refrigerating
- Cuisine: American
- Diet: Vegetarian
Ingredients
- 4–6 firm pickling cucumbers, sliced
- 1 bunch fresh dill (or 1–2 tsp dill weed)
- 4–6 garlic cloves, crushed or whole
- 1 cup filtered water
- 1 cup white vinegar (or apple cider vinegar)
- 2 tbsp kosher salt or pickling salt
- 1 tbsp sugar
- 1 tsp whole black peppercorns (or red pepper flakes)
Instructions
- Gather your ingredients and arrange them on the counter.
- Prepare the cucumbers by washing and slicing them into spears or rounds.
- Sterilize your jars by placing them in boiling water for 10 minutes.
- Prepare the brine by combining water, vinegar, salt, and sugar in a pot and heating until dissolved.
- Assemble your jars by layering cucumbers, garlic, dill, and peppercorns.
- Pour the cooled brine over the cucumbers in the jars, ensuring they are fully submerged.
- Seal the jars tightly and refrigerate for at least 24 hours before enjoying.
Notes
For crunchier pickles, soak cucumbers in ice water for an hour before pickling. Homemade pickles can last up to 2-3 months in the fridge.
Nutrition
- Serving Size: 1 pickle
- Calories: 10
- Sugar: 1g
- Sodium: 200mg
- Fat: 0g
- Saturated Fat: 0g
- Unsaturated Fat: 0g
- Trans Fat: 0g
- Carbohydrates: 2g
- Fiber: 0g
- Protein: 0g
- Cholesterol: 0mg
Keywords: pickles, dill pickles, refrigerator pickles, homemade, condiments



Leave a Reply