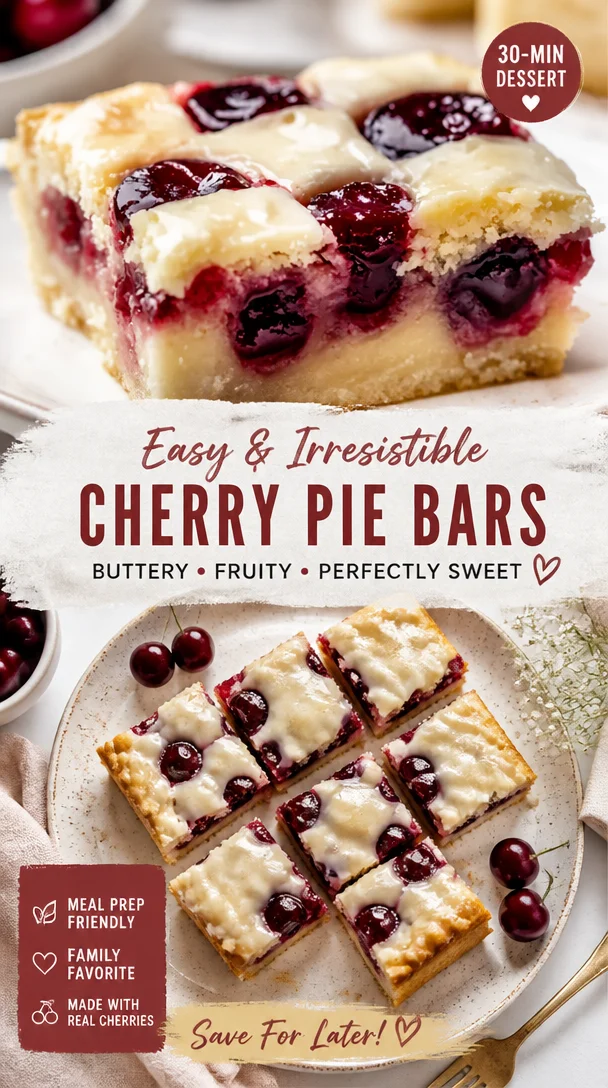
The Sweet Comfort of Cherry Pie Bars: A Nostalgic Treat
Hi there, foodie friends! 🍒✨ Today, I’m thrilled to share a recipe that holds a special place in my heart—Cherry Pie Bars. These little wonders are not just a dessert; they’re a delicious memory wrapped in buttery goodness and sweet cherries.
Personal Story: A Slice of Childhood
Thinking back to my childhood, I can vividly picture my grandmother in her cozy kitchen, her flour-dusted apron tied snugly around her waist. Sweet aromas floated through the air as she’d roll out the perfect pie crust. One of her specialties? A classic cherry pie that could make anyone’s heart skip a beat. I fondly remember helping her pit cherries—okay, let’s be honest; I mostly ate more cherries than I pitted!
Eventually, she started making these cherry pie bars, finding it easier to feed our big family with these handheld treats. They packed all that nostalgic flavor but offered a fun, easy-to-eat twist. It was during those delightful afternoons, surrounded by laughter, that I fell in love not just with the pies, but with the idea of food bringing people together. Today, I’m excited to recreate that family warmth with my Cherry Pie Bars recipe, complete with some modern twists!
Ingredients
Let’s dive into the ingredients you’ll need for these delectable Cherry Pie Bars.
-
1 cup butter, softened: This creamy ingredient is the base of our crust and deliciously contributes to that melt-in-your-mouth texture. If you’re in a pinch, you can substitute with margarine, but nothing beats real butter!
-
2 cups white sugar: Sweetness is the heart of this dessert! You can swap in brown sugar for a deeper flavor, or even coconut sugar for a healthier twist.
-
4 eggs: Eggs help bind everything together. Not an egg-lover? Feel free to substitute with flax eggs (1 tablespoon ground flaxseed mixed with 2.5 tablespoons of water = 1 egg).
-
1 teaspoon vanilla extract: This adds a comforting warmth. If you want to mix it up, you can use maple syrup for a different flavor profile.
-
1/4 teaspoon almond extract: This is the secret ingredient that kicks up the flavor! If you’re unsure about almond extract, feel free to use more vanilla instead.
-
3 cups all-purpose flour: The backbone of our crust! Whole wheat flour or a gluten-free blend works too if you need a healthier or gluten-free option.
-
1 teaspoon salt: Don’t skip the salt! It enhances the sweetness and balances flavors.
-
2 cans cherry pie filling (21 oz each): In the past, I’ve used homemade cherry filling when cherries are in season, but canned works just as well for ease.
-
1 cup powdered sugar: For that luscious icing drizzle on top! You can make your own by blending granulated sugar if you don’t have powdered sugar on hand.
-
1/2 teaspoon vanilla extract: Just like earlier, it adds a sweet kick to our icing.
-
1/2 teaspoon almond extract: Because, yes, we love that nutty flavor even in the icing!
-
2 tablespoons milk: To fluff up the icing. Non-dairy milk works great too.
Step-by-Step Instructions
Alright, let’s roll up our sleeves and get ready to bake! Follow these simple steps, and you’ll have Cherry Pie Bars that will impress everyone at your next gathering.
-
Preheat the Oven: Start by preheating your oven to 350°F (175°C). This ensures even baking and a golden crust.
-
Prepare Your Baking Dish: Grease a 9×13-inch baking dish with butter or line it with parchment paper for easy removal. The parchment paper creates a beautiful edge, making serving easier!
-
Make the Crust: In a large bowl, cream the softened butter and white sugar together until it’s light and fluffy—about 2-3 minutes. This helps incorporate air into the mixture for a tender crust.
-
Add Eggs and Extracts: Beat in the eggs one at a time, mixing well after each addition. Stir in the vanilla and almond extracts—trust me, your kitchen will smell divine!
-
Combine Dry Ingredients: In another bowl, whisk together the flour and salt. Gradually add this to the wet mixture. Don’t overmix; just incorporate until you see the flour disappear.
-
Spread the Mixture: Pour about two-thirds of the batter into the prepared baking dish, spreading it evenly across the bottom. This will serve as the foundation for those juicy cherry fillings!
-
Add Cherry Filling: Gently spoon the cherry pie filling over the batter. You can use a spatula to spread it out evenly, but don’t stress too much if it doesn’t cover perfectly—those cherries deserve the spotlight!
-
Top It Off: Drop spoonfuls of the remaining batter over the cherry filling. It’s okay if some red peeks through—those glimpses of cherry will look lovely when baked!
-
Bake: Pop your dish in the preheated oven and bake for 30-35 minutes, or until the top is golden and a toothpick inserted in the center comes out clean.
-
Cool and Make the Icing: Once it’s done baking, let it cool completely on a wire rack. While it cools, whisk together the powdered sugar, remaining vanilla and almond extract, and milk in a separate bowl until you reach a smooth drizzle consistency.
-
Ice the Bars: Once cooled, cut the bars into lovely squares and drizzle the icing on top. Feel free to go wild with your drizzle—it’ll look so pretty!
-
Serve and Enjoy: Serve these beauties with a scoop of vanilla ice cream or a dollop of whipped cream for a flavor explosion. If you’re like me, enjoy them with a good cup of coffee!
Serving Suggestions
These Cherry Pie Bars are versatile in how they can be served:
-
With Ice Cream: A dollop of vanilla ice cream adds a creamy touch and balances the sweetness.
-
Freshly Whipped Cream: This can lighten up the bars and complement the fruit beautifully.
-
A Hint of Mint: For a fresh twist, garnish with a sprig of mint. It not only looks beautiful but adds a refreshing flavor contrast!
Recipe Variations
Here are a few fun twists to customize your Cherry Pie Bars for any occasion:
-
Berry Blast: Use mixed berry pie filling (like blueberries or raspberries) for a delicious berry medley!
-
Chocolate Swirl: Drizzle melted chocolate over the top of the icing for a decadent touch.
-
Nutty Crunch: Add chopped pecans or walnuts to the crust for a crunchy texture. Just mix them into the batter before baking.
-
Zesty Lemon: Add the zest of one lemon to the cherry filling for a refreshing citrus flavor that cuts through the sweetness.
-
Vegan Version: Swap butter for coconut oil and use flax eggs or applesauce to replace the eggs for a delightful plant-based option.
Chef’s Notes
This recipe has evolved over time in my own kitchen. I initially found it challenging to balance flavors until I discovered the magic of almond extract. Trust me—experimenting is half the fun! Sometimes I even throw in extra vanilla or zest when I’m feeling adventurous.
And don’t get me started on the incredible smell wafting through the house as these bake! It’s like a warm hug—a reminder of the days spent with my grandmother, crafting memories like delicious desserts.
FAQs and Troubleshooting
Here are some common questions I get, along with tips to ensure your Cherry Pie Bars turn out perfectly:
Q: My bars are too crumbly. What went wrong?
A: If they are too crumbly, you might have added too much flour at some point. Make sure to measure accurately and gently fold the ingredients.
Q: Can I use fresh cherries instead of canned filling?
A: Absolutely! Just pit and chop about 4 cups of fresh cherries and toss them with a little sugar and cornstarch to thicken it up.
Q: How do I store leftovers?
A: Keep them in an airtight container at room temperature for up to three days or refrigerate for up to a week. They also freeze wonderfully for up to three months!
Q: Why aren’t my bars baking evenly?
A: Every oven is different—if yours runs hot, decrease the temperature slightly or check your bars a few minutes early!
Nutritional Info
While I love to indulge, I know it’s nice to be mindful too! Here’s a rough idea of the nutritional information per serving (based on 12 servings):
- Calories: 250
- Fat: 10g
- Carbohydrates: 38g
- Protein: 3g
- Sugar: 20g
Now, there you have it—my beloved Cherry Pie Bars that encapsulate warm kitchen memories and family gatherings!
I hope you give this recipe a try and find as much joy in making (and eating) them as I do. Remember, cooking is about creating memories, and every bite of these bars will remind you of home and comfort, just like it does for me. Happy baking! 🍰💕
PrintCherry Pie Bars
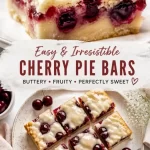
These Cherry Pie Bars are a nostalgic treat, packed with sweet cherries and a buttery crust, perfect for sharing with family and friends.
- Prep Time: 15 minutes
- Cook Time: 35 minutes
- Total Time: 50 minutes
- Yield: 12 servings 1x
- Category: Dessert
- Method: Baking
- Cuisine: American
- Diet: Vegetarian
Ingredients
- 1 cup butter, softened
- 2 cups white sugar
- 4 eggs
- 1 teaspoon vanilla extract
- 1/4 teaspoon almond extract
- 3 cups all-purpose flour
- 1 teaspoon salt
- 2 cans cherry pie filling (21 oz each)
- 1 cup powdered sugar
- 1/2 teaspoon vanilla extract
- 1/2 teaspoon almond extract
- 2 tablespoons milk
Instructions
- Preheat the oven to 350°F (175°C).
- Prepare a 9×13-inch baking dish by greasing it with butter or lining it with parchment paper.
- Make the crust by creaming together the butter and sugar until light and fluffy.
- Add the eggs one at a time, mixing well after each addition, then stir in the vanilla and almond extracts.
- Combine the flour and salt in another bowl, then gradually add to the wet mixture until just incorporated.
- Spread two-thirds of the batter into the prepared baking dish evenly.
- Add the cherry pie filling over the batter.
- Top with spoonfuls of the remaining batter.
- Bake for 30-35 minutes or until golden and a toothpick comes out clean.
- Cool completely on a wire rack, then mix icing ingredients and drizzle over bars.
- Serve and enjoy!
Notes
These bars are delicious served warm with vanilla ice cream or whipped cream.
Nutrition
- Serving Size: 1 bar
- Calories: 250
- Sugar: 20g
- Sodium: 200mg
- Fat: 10g
- Saturated Fat: 6g
- Unsaturated Fat: 4g
- Trans Fat: 0g
- Carbohydrates: 38g
- Fiber: 1g
- Protein: 3g
- Cholesterol: 50mg
Keywords: cherry pie bars, dessert, nostalgic baking


Leave a Reply