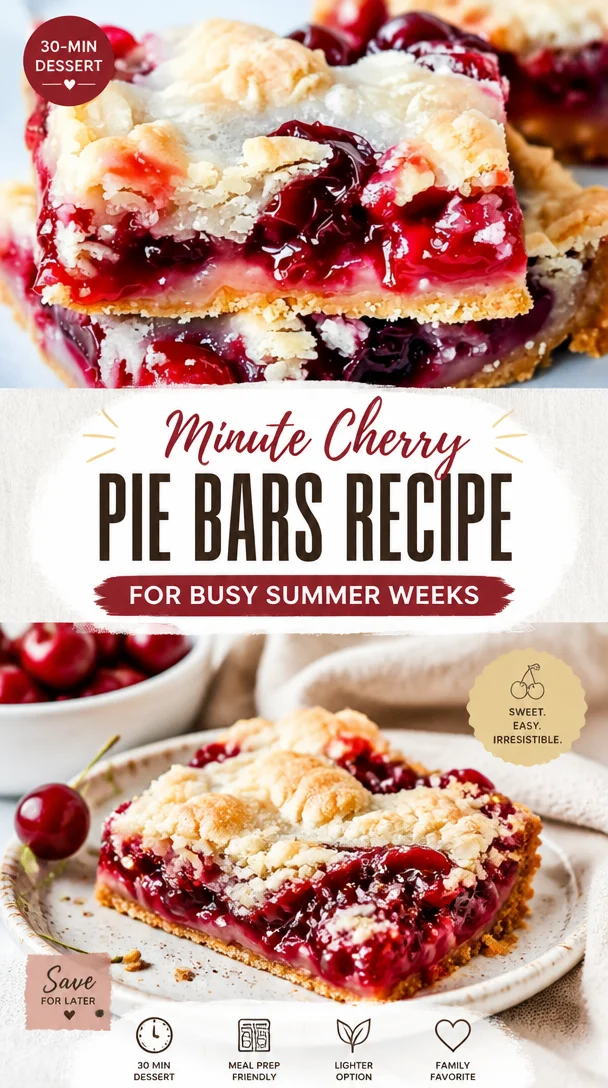
Homemade Cherry Pie Bars: A Sweet Slice of Nostalgia
Hey there, fellow food lovers! If you’re like me, there’s nothing quite like the cherry scent wafting through your kitchen on a cozy afternoon. Today, we’re whipping up a delicious batch of Homemade Cherry Pie Bars that are sure to fill both your home and heart with warmth. Picture this: a slightly crispy, buttery base topped with a sweet, juicy cherry filling, all topped off with an irresistible crumble. Let’s dive in and create something magical together!
A Cherry-Picked Memory
Growing up, my summer days were filled with the joyful anticipation of cherry season. My grandma had a small cherry orchard out back that seemed to beckon me with its bright red treasures. I vividly remember the sound of laughter as my cousins and I raced each other to see who could fill their baskets first, occasionally sampling our “harvest” along the way—what can I say, we were cherry enthusiasts from an early age!
After a long day of fruit picking, we’d gather in the warm kitchen, where my grandma would effortlessly transform our colorful bounty into her famous cherry pie. As we sat around the table, the pie was always the star, with its flaky crust and sweet, tangy filling. Those moments not only filled our bellies but also our hearts, creating memories I cherish to this day. This recipe is my homage to those sunny afternoons and the joy of sharing delicious food with loved ones.
Ingredients
Before we roll up our sleeves and get cooking, here’s what you’ll need to make these delightful Cherry Pie Bars:
-
2 cups all-purpose flour: The foundation of our buttery crust. If you want a gluten-free version, feel free to use a gluten-free flour blend!
-
1 cup unsalted butter, softened (2 sticks): This creates a rich, flaky texture. If you’re in a pinch, coconut oil can be a fun substitute.
-
1/2 cup granulated sugar: Sweetens the crust just right. You can use coconut sugar for a deeper flavor.
-
1/2 teaspoon salt: Balances the sweetness and enhances the flavors.
-
1 teaspoon vanilla extract: Adds a warm, comforting note. Homemade vanilla extract is always a special touch!
-
2 cups fresh or frozen cherries, pitted: The star of the show! If using frozen, make sure you thaw and drain them well to avoid a soggy filling.
-
1/2 cup granulated sugar (adjust to taste): This sweetens our cherry filling. Taste as you go for your preferred sweetness.
-
2 tablespoons cornstarch: Helps thicken the cherry filling and gives it that perfect pie texture.
-
1 tablespoon lemon juice: Brightens the cherry flavor. Lime juice works too!
-
1/2 teaspoon almond extract (optional): This elevates the cherry flavor, bringing out its natural sweetness. A little goes a long way!
-
1/2 cup rolled oats: Adds a delightful crunch to the topping. For a gluten-free option, use certified gluten-free oats.
-
1/4 cup brown sugar: Enhances the richness of the crumble. You can substitute maple syrup for a fun twist.
-
1/4 cup all-purpose flour: Helps bind the topping. Again, feel free to use a gluten-free option here if necessary.
-
1/4 teaspoon cinnamon: Adds warmth and depth to the crumble.
-
1/4 cup butter, melted: Brings it all together. You can opt for a dairy-free butter if needed!
Step-by-Step Instructions
Okay, it’s time to get started! Follow along with these steps for perfect cherry pie bars:
Step 1: Preheat and Prep
Preheat your oven to 350°F (175°C) and line a 9×13 inch baking dish with parchment paper, leaving some overhang on the sides. This makes it super easy to lift the bars out later!
Step 2: Make the Crust
In a medium bowl, combine 2 cups of all-purpose flour, 1/2 cup granulated sugar, and 1/2 teaspoon of salt. Mix these dry ingredients together with a whisk or fork.
Next, add in the softened butter and 1 teaspoon of vanilla extract. Use a pastry cutter or your hands to mix until the mixture forms a crumbly dough. Don’t be afraid to get messy!
Step 3: Press It Down
With your hands, press about two-thirds of the dough into the bottom of your prepared baking dish to form a solid crust. Bake this layer for about 15 minutes until it’s lightly golden.
Step 4: Prepare the Cherry Filling
While the crust is baking, let’s whip up that cherry filling! In a large bowl, combine 2 cups of pitted cherries, 1/2 cup granulated sugar, 2 tablespoons cornstarch, 1 tablespoon lemon juice, and the optional 1/2 teaspoon almond extract. Mix well to coat the cherries and set aside.
Step 5: Make the Crumble Topping
In another bowl, combine 1/2 cup rolled oats, 1/4 cup brown sugar, 1/4 cup flour, 1/4 teaspoon cinnamon, and 1/4 cup melted butter. Stir until crumbly and evenly incorporated.
Step 6: Assemble
Once your crust comes out of the oven, pour the cherry filling over it, spreading it evenly. Then, sprinkle the crumble topping generously over the cherries.
Step 7: Bake to Perfection
Pop the dish back into the oven and bake for about 30-35 minutes or until the topping is golden and the filling is bubbly. Your kitchen will smell heavenly during this time!
Step 8: Cool and Cut
Let the cherry pie bars cool in the pan for at least 20 minutes. If you can resist the urge to dive in, I recommend cooling them completely before slicing to ensure the filling sets nicely.
Serving Suggestions
Once cooled, carefully lift the bars out of the baking dish using the parchment paper. Cut them into squares or rectangles and serve them warm or at room temperature. I love a scoop of vanilla ice cream or a dollop of whipped cream on the side for that extra touch of decadence.
Recipe Variations
Want to switch things up? Here are a few fun variations you can try:
-
Berry Medley: Swap out some of the cherries for blueberries, raspberries, or blackberries for a mixed berry version!
-
Spiced Cherry Pie Bars: Add a pinch of nutmeg or ginger to the cherry filling for a spiced twist.
-
Nutty Crumble: Toss in some chopped nuts (like almonds or pecans) into the crumble topping for added crunch.
-
Coconut Cherry Bars: For a tropical twist, sprinkle sweetened shredded coconut into the topping.
-
Chocolate Cherry Bars: Drizzle melted dark chocolate over the top after baking for a chocolatey indulgence.
Chef’s Notes
Cooking is all about evolution, don’t you think? The beauty of these Cherry Pie Bars is their adaptability. I remember the first time I tried adding almond extract to the filling—I couldn’t believe the depth it brought! Sometimes, it’s the littlest tweaks that create the biggest flavors.
I also have to admit, I’ve had a few kitchen mishaps along the way. There was the time I got a little too eager and had a cherry explosion when cutting into my first batch. Lesson learned: always let them cool a bit longer!
FAQs and Troubleshooting
1. Why did my cherry filling turn out runny?
Make sure you’re using the correct amount of cornstarch, and let it cook for the appropriate time. If you’re using frozen cherries, draining them well after thawing helps keep things in check!
2. Can I use other fruit?
Absolutely! Feel free to substitute with peaches, apples, or even mixed berries. Just adjust the sugar based on the fruit’s tartness.
3. How do I store leftovers?
Store any leftovers in an airtight container in the fridge for up to 3 days—if they last that long! You can also freeze them for up to 2 months.
4. Is there a gluten-free version?
Yes! Use gluten-free all-purpose flour and gluten-free oats in place of their regular counterparts. The results will be just as satisfying!
Nutritional Info (if applicable)
(For those keeping an eye on things, here’s an estimated breakdown per serving. 1 bar out of 12)
- Calories: 220
- Protein: 2g
- Fat: 10g
- Carbohydrates: 32g
- Fiber: 1g
- Sugar: 10g
And there you have it: Homemade Cherry Pie Bars that wrap up nostalgia, comfort, and deliciousness in every bite! I hope this recipe brings you as much joy as it has brought me over the years. So gather your ingredients, invite a friend (or two!), and let’s create some moments that will fill your hearts and your tables. Happy baking! 🍒❤️
PrintHomemade Cherry Pie Bars

Delicious cherry pie bars with a buttery crust and a sweet, juicy cherry filling topped with an irresistible crumble.
- Prep Time: 20 minutes
- Cook Time: 45 minutes
- Total Time: 65 minutes
- Yield: 12 servings 1x
- Category: Dessert
- Method: Baking
- Cuisine: American
- Diet: Vegetarian
Ingredients
- 2 cups all-purpose flour
- 1 cup unsalted butter, softened
- 1/2 cup granulated sugar
- 1/2 teaspoon salt
- 1 teaspoon vanilla extract
- 2 cups fresh or frozen cherries, pitted
- 1/2 cup granulated sugar (adjust to taste)
- 2 tablespoons cornstarch
- 1 tablespoon lemon juice
- 1/2 teaspoon almond extract (optional)
- 1/2 cup rolled oats
- 1/4 cup brown sugar
- 1/4 cup all-purpose flour
- 1/4 teaspoon cinnamon
- 1/4 cup butter, melted
Instructions
- Preheat your oven to 350°F (175°C) and line a 9×13 inch baking dish with parchment paper.
- Combine 2 cups of all-purpose flour, 1/2 cup granulated sugar, and 1/2 teaspoon of salt in a medium bowl.
- Add in the softened butter and 1 teaspoon of vanilla extract; mix until crumbly.
- Press about two-thirds of the dough into the bottom of your prepared baking dish and bake for about 15 minutes.
- Mix together 2 cups of pitted cherries, 1/2 cup granulated sugar, 2 tablespoons cornstarch, 1 tablespoon lemon juice, and optional almond extract in a large bowl.
- Combine 1/2 cup rolled oats, 1/4 cup brown sugar, 1/4 cup flour, 1/4 teaspoon cinnamon, and 1/4 cup melted butter in another bowl until crumbly.
- Pour the cherry filling over the baked crust and sprinkle the crumble topping over it.
- Bake for about 30-35 minutes until the topping is golden and the filling is bubbly.
- Cool in the pan for at least 20 minutes before slicing.
Notes
For best results, allow the bars to cool completely before cutting to ensure the filling sets well.
Nutrition
- Serving Size: 1 bar
- Calories: 220
- Sugar: 10g
- Sodium: 100mg
- Fat: 10g
- Saturated Fat: 6g
- Unsaturated Fat: 4g
- Trans Fat: 0g
- Carbohydrates: 32g
- Fiber: 1g
- Protein: 2g
- Cholesterol: 30mg
Keywords: cherry pie, dessert, bars, sweet, baking


Leave a Reply