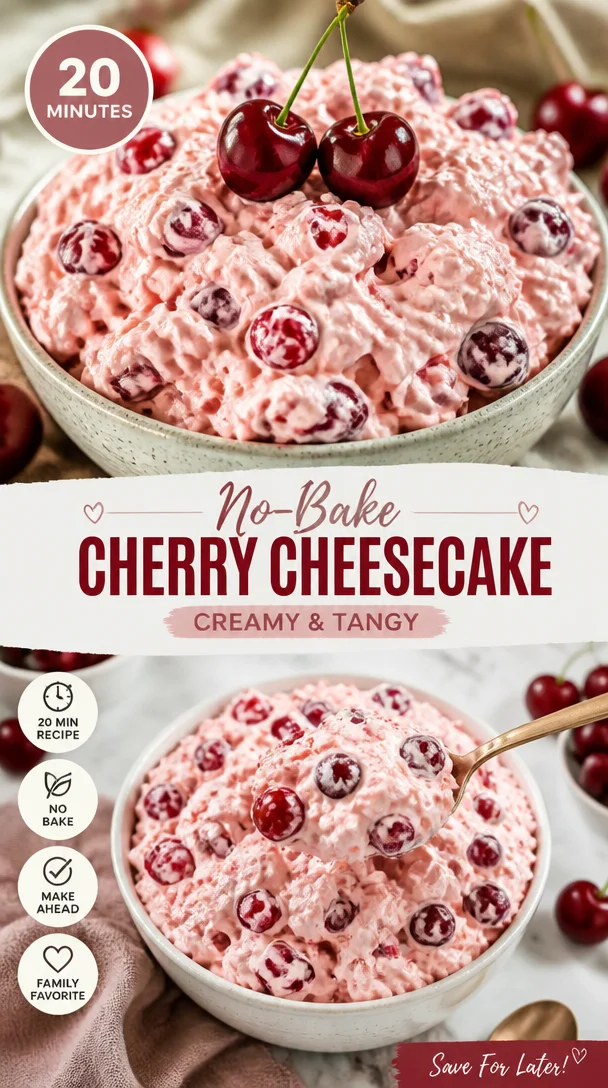
Indulge in Nostalgia with Cherry Cheesecake Dessert
Hey there, food lovers! Today, we’re diving into a delightful treat that will have your taste buds dancing and your heart singing: Cherry Cheesecake Dessert! This dish is a celebration of sweet cherries, creamy goodness, and that irresistible graham cracker crunch. Perfect for any occasion, this dessert brings warmth and joy to your table, just like the cozy kitchens of our childhood.
A Taste of Memory
Let me take you back to my childhood, where the kitchen was always alive with laughter, the aroma of baking wafting through the air, and the sweet sound of family coming together. One of my fondest memories is the annual summer family gathering at my grandma’s house. An afternoon filled with sunshine, backyard games, and of course, dessert! My grandma would whip up her famous cherry cheesecake — a simple yet utterly divine recipe that she had perfected over the years. I can still hear the crack of the graham cracker crust as I excitedly took the first bite, the creamy filling melting in my mouth, and the tart sweetness of cherry pie filling bursting onto my palate.
This Cherry Cheesecake Dessert is inspired by those sunny afternoons, where every bite tells a story and brings us together. So, ready your aprons, my friends! Let’s recreate that delicious memory.
Ingredients
Before we get cooking, let’s gather our ingredients. Here’s what you’ll need:
-
1 package cream cheese (8 oz)
A classic in cheesecakes! Cream cheese offers the rich and creamy texture we love. For a lighter option, you can go with low-fat cream cheese or a dairy-free alternative like cashew cream. -
1 cup marshmallow fluff
This adds sweetness and a light, airy texture. If you’re not a fan of marshmallow fluff, try using a cup of powdered sugar instead for sweetness! -
1 cup whipped cream
Whipped cream gives that perfect airy feel to the cheesecake. Substitute with cool whip if you’re pressed for time, or make your own by whisking heavy cream until it forms soft peaks. -
1 cup cherry pie filling
The star of the show! These sweet cherries provide that lovely tartness. Can’t find cherry pie filling? Consider using fresh or frozen cherries simmered with a little sugar and cornstarch to make a homemade filling! -
1 graham cracker crust
Store-bought for convenience or homemade for a personal touch. You can also use Oreo crust for a chocolatey twist or a gluten-free crust made from almond flour for those needing a gluten-free option.
Step-by-Step Instructions
Now that we have everything ready, let’s bring this dessert to life. Follow these easy steps:
-
Prep Your Ingredients
Start by letting the cream cheese sit out for about 30 minutes to an hour. This will help it soften and be easier to mix. While you’re waiting, preheat your oven to 350°F (175°C) if you’re making a homemade crust. -
Make the Crust
If you’re going homemade, crush the graham crackers until they’re fine crumbs. Combine with melted butter (about 1/4 cup) and press into the bottom of a pie dish. Bake for about 8-10 minutes until golden. Allow it to cool completely before you add the filling. The crust provides the needed crunch and balance to the creamy filling! -
Combine Cream Cheese and Marshmallow Fluff
In a large mixing bowl, beat the softened cream cheese until creamy and smooth using an electric mixer. Gradually add the marshmallow fluff until well combined. This is where the magic happens — you’ll want to stop and taste this delicious mixture! -
Add the Whipped Cream
Gently fold in your whipped cream. Be careful not to deflate it — we want that airy, light texture! A tip from me: Use a spatula and fold, rather than stirring, to maintain that fluffiness. -
Assemble the Cheesecake Filling
Spread the cream cheese mixture evenly over your cooled graham cracker crust. Get it nice and smooth, you’ll want to make it look as pretty as it tastes! -
Top with Cherry Pie Filling
Spoon the cherry pie filling over the top, letting it cascade down the sides a bit. Visual appeal is key, and nothing says summer like bright, juicy cherries on top! -
Chill
Cover your creation with plastic wrap and pop it in the refrigerator for a minimum of 2 hours, or ideally, let it sit overnight. This allows the flavors to meld together beautifully, enhancing the taste of your dessert. -
Serve and Enjoy!
Once it’s set, slice it up, serve on plates, and watch as everyone smiles in delight as they take the first bite.
Serving Suggestions
Presentation can elevate your dessert game! Serve each slice on a pretty plate drizzled with extra cherry pie filling for added flair. A dollop of whipped cream on the side and a sprinkling of crushed graham crackers can create a nice texture contrast. And if you really want to impress, add a fresh mint leaf on top for that perfect finishing touch!
Recipe Variations
Feel like getting creative? Here are some fun twists to try on this Cherry Cheesecake Dessert:
-
Chocolate Cherry Cheesecake
Mix some cocoa powder into the filling or use chocolate graham crackers for the crust to give it a chocolaty depth! -
Lemon Cherry Cheesecake
Add lemon zest and a bit of lemon juice to the cream cheese mixture for a refreshing twist that balances the sweetness. -
Berry Medley Cheesecake
Swap out the cherry pie filling for a mix of blueberry and raspberry filling. It gives a delightful tartness that pairs beautifully with the cheesecake. -
Nutty Crust Variation
For an added crunch, mix finely chopped nuts (like pecans or almonds) into the graham cracker crust. -
Vegan Cherry Cheesecake
Substitute cream cheese with vegan cream cheese and the whipped cream with coconut whipped cream. Use a date and nut crust for a completely plant-based option!
Chef’s Notes
Oh, how this dessert has evolved over the years! Initially, I used to follow my grandma’s recipe down to the last crumb — it felt sacred! But as I began experimenting in my kitchen, I found joy in making it my own. Lighter and creamier, with a few little tweaks here and there! What I love most is how versatile it is; it can adapt to seasons and tastes, yet still maintain the nostalgia that drew me to it in the first place.
I also have to share a funny story—once, in a rush, I accidentally used a saltine cracker crust instead of graham crackers. Let me tell you, it was a disaster! But you know what? We laughed it off and turned the mishap into a fun memory of a dessert gone wrong!
FAQs and Troubleshooting
1. What should I do if my cheesecake filling is too runny?
Make sure your cream cheese is softened and has been mixed well without lumps. If it’s still too runny after folding in the whipped cream, you might need to add a bit more whipped cream to achieve the right consistency!
2. Can I use fresh cherries instead of cherry pie filling?
Absolutely! If you use fresh cherries, just simmer them with a little sugar and cornstarch for a few minutes to create your own filling. It adds a fresh flavor that’s delightful.
3. My crust is too crumbly, what did I do wrong?
This usually happens if there isn’t enough melted butter in the mixture. Make sure to press the crust firmly into the dish, and if it still feels too loose, add a bit more melted butter next time.
4. How can I ensure my dessert sets properly?
Allow it to chill for plenty of time! Giving it a minimum of 4 hours (or overnight for best results) helps the flavors meld and the filling firm up.
Nutritional Info
(Feel free to adjust based on your ingredients for the most accurate information!)
- Calories per serving: 250
- Fat: 15g
- Carbohydrates: 28g
- Protein: 3g
- Sugar: 12g
Conclusion
Creating this Cherry Cheesecake Dessert is a wonderful way to bring a little nostalgia, sweetness, and warmth to your gatherings! Each layer of deliciousness brings back memories while creating new ones around your table. So don your apron, gather your favorite ingredients, and let’s make something warm, hearty, and unforgettable together!
Remember, cooking is about love, sharing, and making memories. So enjoy every moment in your kitchen, and until next time, happy cooking! 🍒✨
PrintCherry Cheesecake Dessert
A delightful Cherry Cheesecake Dessert that combines sweet cherries, creamy filling, and a crunchy graham cracker crust, perfect for any occasion.
- Prep Time: 15 minutes
- Cook Time: 10 minutes
- Total Time: 135 minutes
- Yield: 8 servings 1x
- Category: Dessert
- Method: Chilling
- Cuisine: American
- Diet: Vegetarian
Ingredients
- 1 package cream cheese (8 oz)
- 1 cup marshmallow fluff
- 1 cup whipped cream
- 1 cup cherry pie filling
- 1 graham cracker crust
Instructions
- Prep your ingredients by letting the cream cheese sit out for 30-60 minutes and preheat your oven to 350°F (175°C).
- Make the crust by crushing graham crackers and mixing with 1/4 cup melted butter. Press into a pie dish and bake for 8-10 minutes until golden.
- Combine cream cheese and marshmallow fluff in a bowl using an electric mixer until smooth.
- Add the whipped cream gently, folding to maintain fluffiness.
- Assemble the cheesecake filling evenly over the cooled crust.
- Top with cherry pie filling, cascading over the edges.
- Chill in the refrigerator for a minimum of 2 hours, or overnight for best results.
- Serve and enjoy!
Notes
For added flair, drizzle with extra cherry pie filling and a dollop of whipped cream. Optionally, garnish with a mint leaf.
Nutrition
- Serving Size: 1 serving
- Calories: 250
- Sugar: 12g
- Sodium: 200mg
- Fat: 15g
- Saturated Fat: 9g
- Unsaturated Fat: 4g
- Trans Fat: 0g
- Carbohydrates: 28g
- Fiber: 1g
- Protein: 3g
- Cholesterol: 30mg
Keywords: cheesecake, dessert, cherry, nostalgic, easy recipes


Leave a Reply