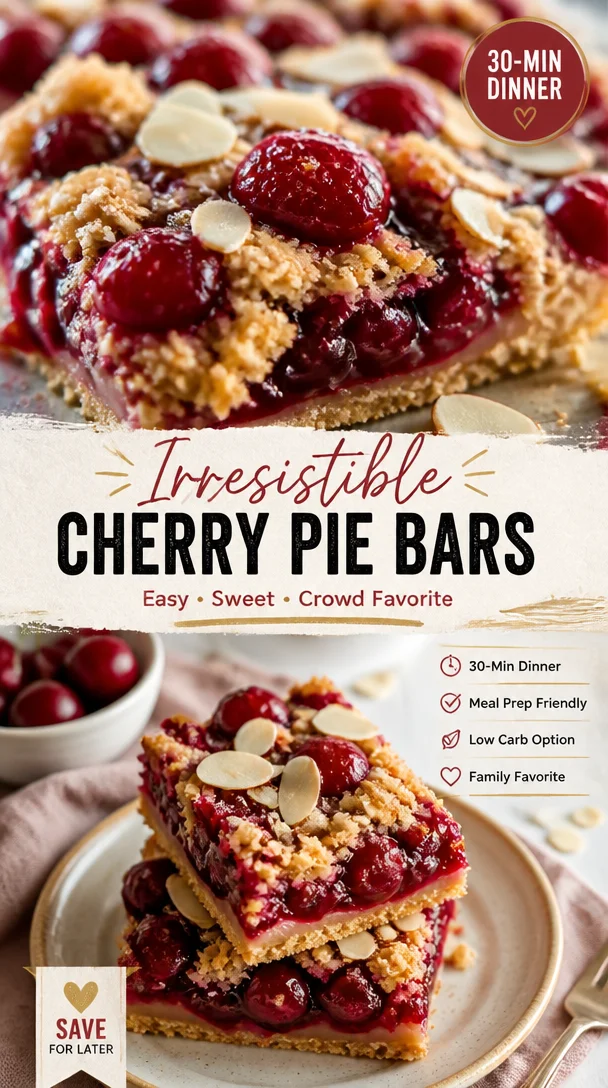
Cherry Pie Bars: A Nostalgic Delight to Brighten Your Day
Hey there, fellow foodies! It’s Nina, and today I’m thrilled to share a recipe that holds a special place in my heart—Cherry Pie Bars. These delightful treats are not just a quick dessert; they bring back a whirlwind of memories from my childhood spent in warm kitchens surrounded by the sweet aroma of freshly baked goods.
A Slice of My Childhood
When I think about cherry pie, my mind immediately wanders back to my grandma’s kitchen, where I spent countless afternoons learning the art of baking. She had this magical way of turning simple ingredients into mouthwatering delights—the kind that could light up a room and bring a family together.
One sunny Saturday, she decided we were going to make her famous cherry pie. But this time, we wouldn’t just use a crust; we were experimenting with bars! I can still hear her soft laughter as we spilled flour everywhere, our hands covered in dough and cherry filling as we baked together. That day, her familiar words rang through my ears: “The secret ingredient is always love.” Little did I know that years later, I’d be sharing this recipe with all of you!
So, let’s talk about how we can capture that same warmth and comfort in our own kitchens with a simple yet delightful recipe for Cherry Pie Bars.
Ingredients You’ll Need
Let’s gather our ingredients. Each one plays a vital role in creating that perfect, nostalgic treat!
-
1 cup all-purpose flour
- This is the foundation of our crust. If you’re gluten-free, feel free to substitute with a gluten-free flour blend.
-
1/2 cup unsalted butter, softened
- The star of our show! Butter adds richness and flavor. Make sure it’s softened for easy mixing. If you’re counting calories, you can swap some of the butter for applesauce—just keep in mind it may alter the texture slightly.
-
1/4 cup granulated sugar
- This sweetens the crust and balances the tartness of the cherries. You can use coconut sugar here for a healthier twist.
-
1/4 teaspoon salt
- A tiny pinch that enhances all the flavors. Don’t skip this; it’s crucial!
-
1 cup cherry pie filling
- This is where the magic really happens! Feel free to use homemade cherry filling or a can—it’s all about what you prefer. If you’re feeling adventurous, swap it out with blueberries or raspberries.
-
1/4 teaspoon almond extract (optional)
- This adds an unexpected but wonderful flavor that pairs beautifully with cherries. If you’re not an almond fan, you can easily leave this out!
-
1/4 cup powdered sugar (for dusting)
- This is the final touch that makes our Cherry Pie Bars look like they just stepped out of a bakery!
Step-by-Step Instructions
Ready to bake some Cherry Pie Bars? Let’s dive into the process!
-
Preheat Your Oven
- Start by preheating your oven to 350°F (175°C). This ensures that your bars bake evenly and come out perfectly golden.
-
Prepare Your Baking Dish
- Grab an 8×8-inch baking dish and grease it lightly or line it with parchment paper for easy removal later. This little hack saves you from any sticky situations!
-
Mixing the Crust
- In a mixing bowl, combine the softened butter, granulated sugar, and salt. Use a hand mixer or a whisk to mix until you have a light and fluffy mixture.
- Add the flour gradually and mix until you get a soft dough. Don’t worry; it should feel slightly crumbly but hold together when pressed.
-
Pressing the Dough
- Take about two-thirds of the dough and press it firmly into the bottom of your prepared baking dish. Make sure it’s evenly spread—this will be our crust! Feel free to use your fingers or the back of a measuring cup to get it nice and even.
-
Cherry Filling Time!
- Next, spread the cherry pie filling evenly over the crust. If you’re using almond extract, sprinkle it over the filling now for an extra flavor boost. This is where the magic happens, folks!
-
Topping it Off
- Crumble the remaining one-third of the dough over the cherry filling. It doesn’t have to be perfect; those little crumbles create a lovely texture on top.
-
Baking the Bars
- Pop the dish into the preheated oven and bake for about 30-35 minutes or until the top is golden and the filling is bubbly. I like to keep an eye on them the last few minutes—nothing beats that glorious smell mingling through your house!
-
Cooling Down
- Once baked, remove the bars from the oven and let them cool completely in the dish on a wire rack. This step is key; letting them cool ensures they set perfectly.
-
Slicing and Dusting
- After cooling, dust with powdered sugar before slicing them into squares or bars. This makes for a beautiful presentation and adds that sweet finishing touch!
Serving Suggestions
Presentation is everything! Here’s how to serve up your Cherry Pie Bars for maximum impact:
-
Classic Style: Serve the bars on a lovely platter dusted with powdered sugar, alongside a scoop of vanilla ice cream.
-
Cozy Vibes: Place them on a rustic wooden board with fresh cherries and mint sprigs for that Pinterest-worthy touch.
-
Tea Time: Pair with a warm cup of coffee or tea for a delightful afternoon treat! Who doesn’t love a sweet snack during their tea time?
Recipe Variations
Let’s spice things up! Here are some creative twists on your Cherry Pie Bars:
-
Berry Bliss: Substitute cherry filling with mixed berries—strawberries, raspberries, and blueberries make for a colorful and flavorful twist!
-
Nutty Addition: Stir in some chopped nuts, like almonds or walnuts, into the crust for added crunch and nutty flavor.
-
Chocolate Drizzle: Melt some chocolate chips and drizzle them over the cooled bars for an indulgent treat that will satisfy any chocoholic.
-
Vegan-Friendly: Swap the butter for coconut oil and use a flax egg (1 tablespoon flaxseed meal mixed with 2.5 tablespoons of water) as a binding agent.
-
Zesty Lemon: Add a touch of lemon juice and zest to the cherry filling for a refreshing citrus twist that brightens up the flavor.
Chef’s Notes
Ah, the joy of baking! Over the years, this recipe has become a staple in my home, and it never fails to bring smiles to the faces of family and friends. There’s something incredibly satisfying about sharing a slice of homemade goodness with loved ones.
I fondly remember experimenting with different fillings and toppings, trying to find the perfect balance of sweet and tart. Remember, cooking is all about having fun and making it your own! Don’t be afraid to try new things or make this recipe your own. Who knows what delicious surprises await?
FAQs and Troubleshooting
Here are a few common questions I often get, along with their answers:
Q: Can I use fresh cherries instead of pie filling?
A: Absolutely! Just make sure to pit and slice them, and you may want to add a bit of sugar and cornstarch to thicken the filling.
Q: How do I know when the bars are done?
A: Look for a golden brown crust and bubbling filling! A toothpick inserted into the center should come out clean.
Q: Can I prepare the crust ahead of time?
A: Yes, you can prepare the crust the day before! Just cover it and store it in the refrigerator until you’re ready to bake.
Q: Can I freeze these bars?
A: Definitely! Wrap them tightly in plastic wrap and store them in an airtight container. They’ll keep well in the freezer for up to three months—perfect for that sweet tooth craving later!
Nutritional Information
While I believe treats like these should be enjoyed in moderation, here’s a quick breakdown for those keeping track:
- Calories: Approximately 180 per serving (based on 12 servings)
- Fat: 10g
- Carbohydrates: 18g
- Protein: 2g
Remember, these numbers can vary based on specific ingredients used and serving sizes.
So there you have it—delicious, comforting, and oh-so-easy Cherry Pie Bars! I hope this recipe brings you as much joy as it has brought to me and my family. Let’s keep the love of honest, simple cooking alive. Now, grab those ingredients, roll up your sleeves, and let’s create something special together!
Until next time, happy baking! 🍒❤️
PrintCherry Pie Bars

These delightful Cherry Pie Bars are a nostalgic treat that brings warmth and comfort to any kitchen. Easy to make and full of flavor, they’re perfect for sharing with family and friends.
- Prep Time: 15 minutes
- Cook Time: 35 minutes
- Total Time: 50 minutes
- Yield: 12 servings 1x
- Category: Dessert
- Method: Baking
- Cuisine: American
- Diet: Vegetarian
Ingredients
- 1 cup all-purpose flour
- 1/2 cup unsalted butter, softened
- 1/4 cup granulated sugar
- 1/4 teaspoon salt
- 1 cup cherry pie filling
- 1/4 teaspoon almond extract (optional)
- 1/4 cup powdered sugar (for dusting)
Instructions
- Preheat your oven to 350°F (175°C).
- Prepare an 8×8-inch baking dish by greasing it lightly or lining it with parchment paper.
- Combine the softened butter, granulated sugar, and salt in a mixing bowl until light and fluffy.
- Add the flour gradually and mix until you have a soft dough.
- Press about two-thirds of the dough into the bottom of the prepared baking dish.
- Spread the cherry pie filling evenly over the crust and add almond extract if using.
- Crumble the remaining dough over the cherry filling.
- Bake for 30-35 minutes or until the top is golden and the filling is bubbly.
- Cool completely on a wire rack before slicing.
- Dust with powdered sugar before serving.
Notes
Feel free to substitute with gluten-free flour or experiment with different fruit fillings. These bars can be frozen for up to three months.
Nutrition
- Serving Size: 1 bar
- Calories: 180
- Sugar: 10g
- Sodium: 100mg
- Fat: 10g
- Saturated Fat: 6g
- Unsaturated Fat: 3g
- Trans Fat: 0g
- Carbohydrates: 18g
- Fiber: 1g
- Protein: 2g
- Cholesterol: 30mg
Keywords: Cherry Pie Bars, dessert, nostalgic dessert, easy baking, comforting treats


Leave a Reply