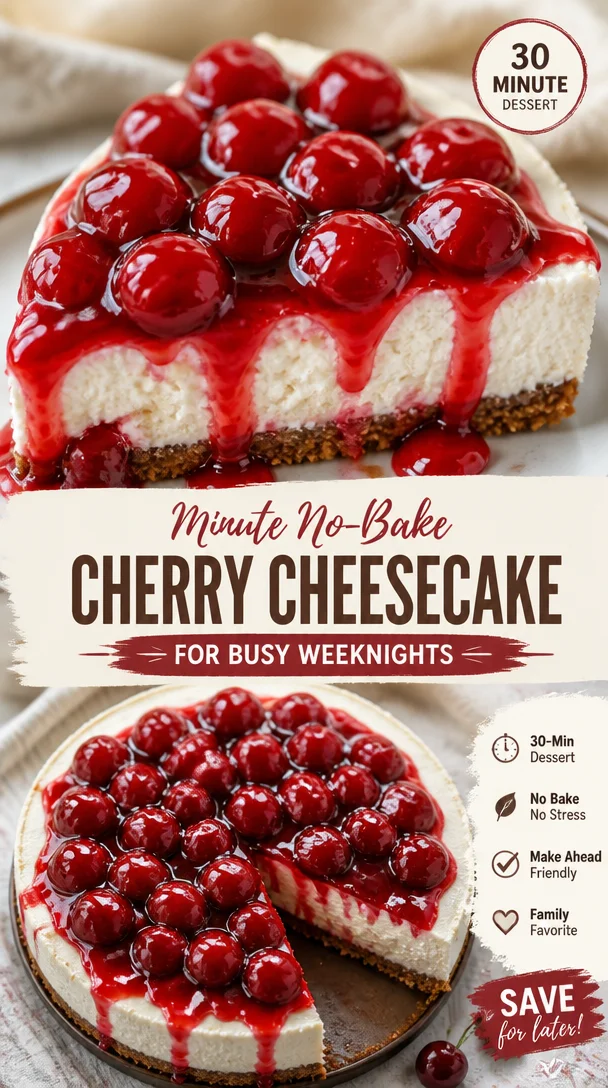
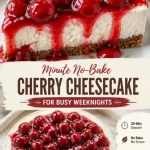
No Bake Cherry Cheesecake: A Sweet Slice of Nostalgia
Ah, the sweet and creamy delight of a cherry cheesecake! It’s one of those desserts that takes me back to my childhood, when afternoons were spent gathering in the kitchen, laughter mingling with the scent of something delicious. There’s just something magical about a cheesecake that can brighten up anyone’s day—especially when it’s no-bake! 🍰
Today, I’m excited to share my favorite No Bake Cherry Cheesecake recipe with you. The best part? It’s super simple, requires no special baking skills, and is sure to impress your friends and family. So, roll up your sleeves, pour yourself a cup of something cozy, and let’s get started!
A Slice of Nostalgia
I remember the first time I had a cherry cheesecake. I was at my grandmother’s house, where the kitchen was always buzzing. She had her favorite recipes scribbled on old recipe cards, much like the one I still use today for this cherry cheesecake. That warm summer afternoon, we gathered around the table, and she proudly presented her no-bake masterpiece, topped with vibrant red cherries that gleamed like jewels in the sun.
As we dug in, the cool, creamy cheesecake melted in our mouths and paired perfectly with a buttery graham cracker crust. It wasn’t just the flavors but the memories we created together that made it special. Now, whenever I make this cheesecake, I’m reminded of those sweet moments and the love that went into every bite.
Ingredients
Here’s what you’ll need to whip up this heavenly dessert:
-
1 cup graham cracker crumbs
Perfect for that crunchy crust! If you don’t have graham crackers, you can use digestive biscuits or even crushed Oreo cookies for a fun twist. -
1/2 cup unsalted butter, melted
Butter brings everything together and adds richness. If you’re looking for a lighter option, you can substitute with coconut oil. -
2 cups cream cheese, softened
This is the star of the show! Make sure to let it sit out for a bit so it’s nice and creamy. Vegan cream cheese is also an option for a dairy-free version. -
1 cup powdered sugar
This sweetens the cheesecake just right! If you’re in a pinch, granulated sugar will work (just note that it may take a bit longer to dissolve). -
1 teaspoon vanilla extract
Adds a beautiful warmth and depth of flavor. If you don’t have vanilla, almond extract works wonders too! -
1 cup heavy whipping cream
For that luxurious, fluffy texture! You can substitute this with coconut cream for a dairy-free alternative. -
1 can cherry pie filling
The crowning glory of our cheesecake! If you want to keep it fresh, feel free to use fresh or frozen cherries cooked down with a bit of sugar for an elegant touch.
Step-by-Step Instructions
Let’s get cooking! Follow these steps to create a no-bake cherry cheesecake that’s bound to be a hit.
Step 1: Make the Crust
-
Combine graham cracker crumbs and melted butter in a mixing bowl.
Mix them until they resemble wet sand. This is where the magic begins! The ratio is key—you want a crust that holds together well. -
Press the mixture firmly into the bottom of a 9-inch springform pan.
Use the back of a measuring cup or your fingers to pack it tightly. This ensures a sturdy base that won’t crumble when you slice into it. -
Refrigerate the crust while you prepare the filling.
This will help it set up nicely and give it a bit of chill.
Step 2: Prepare the Filling
-
In a large bowl, beat the softened cream cheese with an electric mixer until smooth.
This is where the creaminess comes into play! Mix on medium speed for about 2-3 minutes—you want it to be free of lumps. -
Add powdered sugar and vanilla extract.
Beat until fully incorporated and the mixture becomes thick and creamy. Oh, that sweetness is heavenly! -
In another bowl, whip the heavy cream until stiff peaks form.
This is the secret to a light and fluffy cheesecake! Fold this gently into the cream cheese mixture using a spatula. It’s like folding clouds into a dream! -
Combine the two mixtures until well-blended.
Be gentle here—overmixing can deflate all that delicious air you just whipped into the cream.
Step 3: Assemble the Cheesecake
-
Pour the cream cheese filling over the chilled crust, smoothing the top with a spatula.
Let that filling be spread evenly, which helps with presentation later. You want every slice to be perfect! -
Cover the cheesecake with plastic wrap and refrigerate for at least 4 hours (or overnight, if you can wait!).
Patience is key here! This allows it to set up beautifully.
Step 4: Top it Off
-
When you’re ready to serve, remove the cheesecake from the springform pan.
Gently run a knife around the edges before unfastening to prevent any sticking. -
Spoon the cherry pie filling over the top.
You can be as generous as you like! Make it pretty, and don’t worry if it spills over the sides a bit; it only adds to the charm.
Serving Suggestions
Slice into that luscious cheesecake and serve it chilled. You can offer a dollop of whipped cream or a sprinkle of crushed nuts for added texture. Arrange it on a rustic wooden board or a beautiful cake stand to elevate your presentation—there’s something about a well-served dessert that makes it taste even better.
Recipe Variations
Here are some creative ideas to switch things up:
-
Chocolate Cherry Cheesecake: Add melted chocolate to the cream cheese mixture for a rich, decadent twist.
-
Berry Bliss Cheesecake: Swap cherry pie filling for your choice of mixed berries—strawberries, blueberries, or raspberries will all work beautifully.
-
Zesty Lemon Cheesecake: Incorporate some lemon juice and zest into the filling for a refreshing citrus spin.
-
Nutty Crust: Add crushed nuts like almonds, pecans, or walnuts to your crust for a delightful crunch.
-
Mint Chocolate Cherry: Mix in a few drops of peppermint extract to the cream cheese and layer with mint chocolate chips. Pair it with the cherry topping for a fancy flair!
Chef’s Notes
This No Bake Cherry Cheesecake has evolved over the years. I used to bake my cheesecakes, but I found that the no-bake version is so much simpler—and let’s be real, way more foolproof! Plus, it’s a fantastic dessert that you can whip up on the fly. I often find myself making it for last-minute gatherings or potlucks. The joy is palpable when people take that first bite and their eyes light up!
One time, I accidentally grabbed the salt instead of the sugar! Let me tell you, my family’s reaction was quite the spectacle. But we all had a good laugh and learned to always double-check our pantry before diving in!
FAQs and Troubleshooting
Q: Why did my cheesecake not set properly?
A: The most common reason is that the cream cheese wasn’t whipped enough or the mixture wasn’t chilled long enough. Make sure to beat it until smooth and pop it in the fridge for enough time to set.
Q: Can I make this cheesecake dairy-free?
A: Absolutely! Use vegan cream cheese and coconut cream for the filling. You can still enjoy rich flavors without the dairy.
Q: What’s the best way to cut cheesecake?
A: Use a hot, dry knife for clean slices! Wipe the knife with a warm, damp cloth between cuts for beautiful, neat pieces.
Q: How long will leftovers last in the fridge?
A: If you have any leftovers (which is rare in my experience!), they’ll keep well covered in the fridge for up to 3-4 days. Just make sure to top with cherries right before serving.
Nutritional Info (Optional)
For all you health-conscious foodies, here’s a rough estimate of the nutritional information per serving (assuming 10 servings):
- Calories: 320
- Total Fat: 22g
- Saturated Fat: 12g
- Cholesterol: 75mg
- Sodium: 200mg
- Total Carbohydrates: 28g
- Dietary Fiber: 1g
- Sugars: 12g
- Protein: 4g
Remember, these values can vary based on the specific brands and quantities you use!
Final Thoughts
Making a No Bake Cherry Cheesecake is more than just about baking—it’s about creating memories and sharing joy. I hope this recipe brings a sprinkle of sweetness into your kitchen and spurs fond memories of friends and family gathered around your table.
Happy baking, and don’t forget to savor every slice! Let’s get cozy, and whip up something magical today! 🍒✨
PrintNo Bake Cherry Cheesecake
A creamy and delightful no-bake cherry cheesecake that evokes sweet nostalgic memories, perfect for impressing friends and family.
- Prep Time: 30 minutes
- Cook Time: 240 minutes
- Total Time: 270 minutes
- Yield: 10 servings 1x
- Category: Dessert
- Method: No-Bake
- Cuisine: American
- Diet: Vegetarian
Ingredients
- 1 cup graham cracker crumbs
- 1/2 cup unsalted butter, melted
- 2 cups cream cheese, softened
- 1 cup powdered sugar
- 1 teaspoon vanilla extract
- 1 cup heavy whipping cream
- 1 can cherry pie filling
Instructions
- Combine graham cracker crumbs and melted butter in a mixing bowl.
- Mix them until they resemble wet sand.
- Press the mixture firmly into the bottom of a 9-inch springform pan.
- Refrigerate the crust while you prepare the filling.
- Beat the softened cream cheese with an electric mixer until smooth.
- Add powdered sugar and vanilla extract.
- Whip the heavy cream until stiff peaks form.
- Combine the two mixtures until well-blended.
- Pour the cream cheese filling over the chilled crust.
- Cover the cheesecake with plastic wrap and refrigerate for at least 4 hours.
- Remove the cheesecake from the springform pan.
- Spoon the cherry pie filling over the top.
Notes
For variations, consider adding chocolate or fresh berries. Ensure the filling is well blended but avoid overmixing to keep it fluffy.
Nutrition
- Serving Size: 1 slice
- Calories: 320
- Sugar: 12g
- Sodium: 200mg
- Fat: 22g
- Saturated Fat: 12g
- Unsaturated Fat: 10g
- Trans Fat: 0g
- Carbohydrates: 28g
- Fiber: 1g
- Protein: 4g
- Cholesterol: 75mg
Keywords: no bake cheesecake, cherry pie filling, creamy dessert, easy cheesecake, nostalgic dessert


Leave a Reply