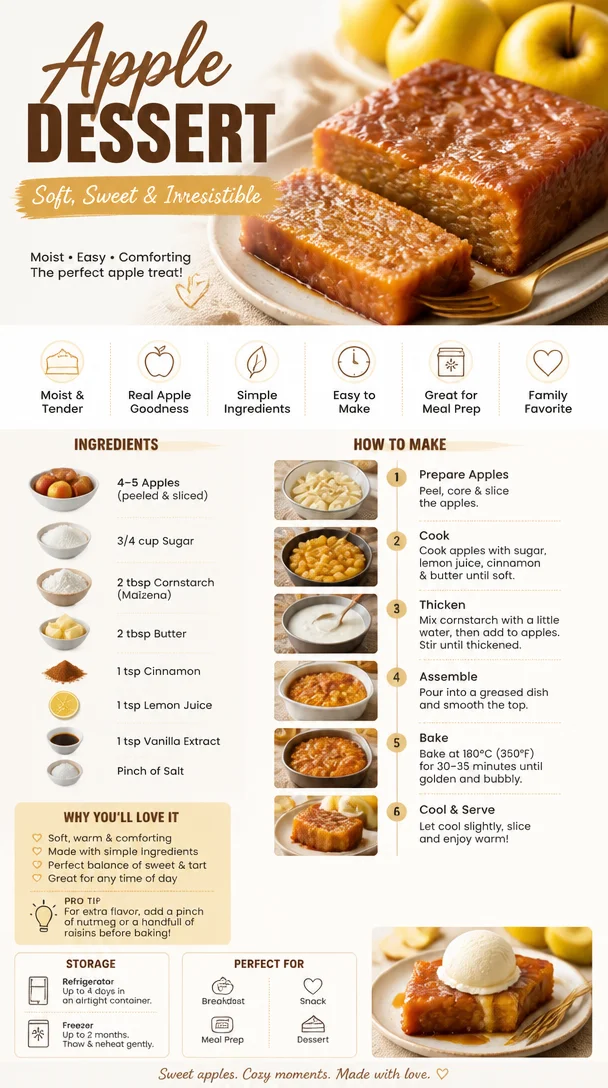
The Ultimate Apple Dessert: A Sweet Slice of Nostalgia
Hey there, food lovers! Today, I’m thrilled to share a heartwarming recipe that’s as comforting as a hug from grandma—our amazing apple dessert! This dish captures the essence of home with every bite, combining sweet, tender apples with a delightful crunch and a hint of sweetness that feels like a warm memory wrapped up in a cozy blanket.
A Walk Down Memory Lane: The Magic of Apple Desserts
Growing up, my home was filled with the warm aromas of baking apples. Whenever my family gathered, especially in the fall, my mom would whip up her famous apple dessert. The entire kitchen would transform into our favorite hangout spot, laughter and stories flowing while we waited for the golden-brown goodness to come out of the oven.
I remember one cool autumn afternoon, my little brother and I were in charge of peeling the apples. What a sticky task that was! We made a mess, and while I hung onto the knife with the determination of a future chef, my brother ended up launching peels across the kitchen, like they were confetti celebrating our labor. It was a sight to behold!
And the best part? Once we finally sat down at the table, that bubbling, apple-filled dish was a masterpiece of flavor and tradition. This recipe will take you on that same nostalgia trip, bringing warmth and joy to your kitchen!
Ingredients That Shine
Let’s gather our ingredients. Here’s what you’ll need for this scrumptious apple dessert:
-
Apples
- Go for a mix of sweet and tart apples, such as Granny Smith and Honeycrisp, for depth of flavor. If you can’t find fresh apples, feel free to substitute with canned apple slices (just drain and pat dry).
-
Sugar
- Basic granulated sugar for sweetness. If you’re looking to mix it up, brown sugar adds a lovely caramel note, or you can use a sugar substitute like stevia for a low-calorie option.
-
Cornstarch (Maïzena)
- This will be our thickening agent, giving the filling its delightful texture. You can swap it for arrowroot powder or tapioca starch if you’re looking for a gluten-free option.
Step-by-Step Instructions
Let’s roll up our sleeves and get cooking! Here’s how you can whip up this wonderful apple dessert.
-
Preheat the Oven
- Start by preheating your oven to 350°F (175°C). This waiting time is perfect for getting your kitchen set up and smelling cozy already.
-
Prepare Your Apples
- Peel, core, and slice your apples into thin wedges. Aim for about 6-8 cups. Here’s a little tip: try using a mix of apple varieties to create a complex flavor that will wow your taste buds!
-
Mix the Filling
- In a large bowl, combine the sliced apples, sugar, and cornstarch. Toss everything together until the apples are well coated. This ensures that each slice has that delicious sweetness!
-
Prepare the Dish
- Grab a baking dish and lightly grease it with butter. It adds an extra layer of flavor and helps with easy cleanup. Pour your apple filling into the dish, spreading it out evenly.
-
Make the Topping
- In another bowl, combine flour, oats, and a pinch of salt. Add cold butter into the mix and cut it in using a pastry cutter or your fingers until it resembles coarse crumbs. This is where the magic happens! The topping becomes the crispy icing on the cake, so to speak.
-
Assemble and Bake
- Sprinkle the crumbly topping evenly over the apple mixture. Bake for about 45-55 minutes, until the topping is golden brown and the apples are bubbly. Pro tip: if you notice the topping browning too quickly, cover it loosely with foil.
-
Cool and Serve
- Let it cool for a few minutes before serving. It’s the hardest part, I know! But trust me, this will allow the flavors to settle. Serve warm with a scoop of vanilla ice cream or a dollop of whipped cream on top!
Serving Suggestions
When it comes to presentation, don’t be shy! Here are a few ways to serve your apple dessert that’ll have everyone oohing and aahing:
- Classic Style: Serve right from the baking dish with a generous scoop of vanilla ice cream melting over the top.
- Elegant Plating: Use a large spoon to place a mound of apple dessert on a plate, then drizzle with caramel sauce and sprinkle some crushed nuts for added texture.
- Breakfast Delight: Think outside the dessert box! Serve warm with Greek yogurt and a sprinkle of cinnamon for a cozy breakfast treat.
Recipe Variations
Here’s the fun part—let’s get creative with our apple dessert! Here are some delicious variations you might want to try:
-
Cinnamon Spice Twist: Add a teaspoon of cinnamon or a dash of nutmeg in the filling for that extra warmth and fall flavor.
-
Berry Apple Medley: Toss in a cup of fresh or frozen berries, like blueberries or raspberries, for a fruity flair that brightens up the dish!
-
Nutty Crunch: Mix in some chopped walnuts or pecans with the topping for an extra crunch. Nuts bring such a wonderful layer of flavor!
-
Caramel Delight: Lightly drizzle caramel sauce over the apple filling before covering with the topping for a rich, indulgent treat.
-
Maple Pecan: Swap out the sugar for maple syrup in the filling and add chopped pecans to the topping for a delicious transition into new flavors.
Chef’s Notes
Oh, where do I even begin? This recipe has been through the wringer in my kitchen, evolving with every season and family gathering. I remember the time I decided to make it with a friend who was allergic to gluten; we experimented with oatmeal as a base for the topping, and it turned out great! The kitchen turned into a whirl of laughter and flour, just the way I love it.
Whenever I make this dessert, it always conjures memories of my family’s love for comfort food. No matter where life takes me, the aroma of baked apples and sugar is an anchor—reminding me of home.
FAQs and Troubleshooting
1. My topping is too dry! What should I do?
- If you find your topping is a bit dry, you can add a splash of cold water or milk to help it hold together better. Remember, it should be crumbly but not too crumbly!
2. Can I prep this dessert ahead of time?
- Absolutely! You can prepare the apple filling ahead of time and keep it refrigerated. Just add the topping right before baking to ensure it stays crispy!
3. How do I ensure my apples don’t turn mushy?
- Be sure not to over-bake them! Keep an eye on them during the last few minutes of baking. Every oven is a little different!
4. What can I do with leftovers?
- Store them in an airtight container in the fridge for up to 3 days. I love to enjoy it for breakfast with a splash of milk or yogurt!
Nutritional Info
While indulging in something sweet, it’s always good to be mindful. Each serving of this apple dessert (approximately 1/8 of the entire dish) contains:
- Calories: 250
- Total Fat: 8g
- Saturated Fat: 4g
- Carbohydrates: 42g
- Fiber: 3g
- Sugars: 18g
- Protein: 2g
This nutritional breakdown is an estimate and can vary depending on ingredient choices and portions.
And there you have it! A delicious apple dessert that’s perfect for sharing or simply enjoying on a quiet evening. I hope this recipe fills your kitchen with warmth, nostalgia, and the joy of good food. Remember, the best meals bring us together, and this one is sure to do just that. Happy cooking, and let’s keep savoring those cozy moments! ✨🍎
PrintThe Ultimate Apple Dessert
A heartwarming apple dessert that combines sweet, tender apples with a delightful crunch, evoking warm memories of home.
- Prep Time: 20 minutes
- Cook Time: 55 minutes
- Total Time: 75 minutes
- Yield: 8 servings 1x
- Category: Dessert
- Method: Baking
- Cuisine: American
- Diet: Vegetarian
Ingredients
- 6–8 cups apples (mix of sweet and tart, like Granny Smith and Honeycrisp)
- 1 cup granulated sugar (or brown sugar for a caramel note)
- 3 tablespoons cornstarch (or arrowroot powder)
- 1 cup flour
- 1 cup oats
- 1/2 cup cold butter
- Pinch of salt
Instructions
- Preheat the oven to 350°F (175°C).
- Peel, core, and slice apples into thin wedges.
- Mix the sliced apples, sugar, and cornstarch in a bowl until well coated.
- Prepare a baking dish by greasing it with butter and pour the apple mixture into it.
- Combine flour, oats, and salt in another bowl; cut in cold butter until it resembles coarse crumbs.
- Sprinkle the topping evenly over the apple mixture.
- Bake for about 45-55 minutes until the topping is golden brown and the apples are bubbly.
- Cool for a few minutes before serving warm with vanilla ice cream or whipped cream.
Notes
Add cinnamon or nutmeg for extra warmth, or mix in nuts for added crunch. Can be prepped ahead of time by refrigerating the filling.
Nutrition
- Serving Size: 1 serving
- Calories: 250
- Sugar: 18g
- Sodium: 150mg
- Fat: 8g
- Saturated Fat: 4g
- Unsaturated Fat: 4g
- Trans Fat: 0g
- Carbohydrates: 42g
- Fiber: 3g
- Protein: 2g
- Cholesterol: 15mg
Keywords: apple dessert, baked apples, comfort food, nostalgic recipe, fall dessert





Leave a Reply