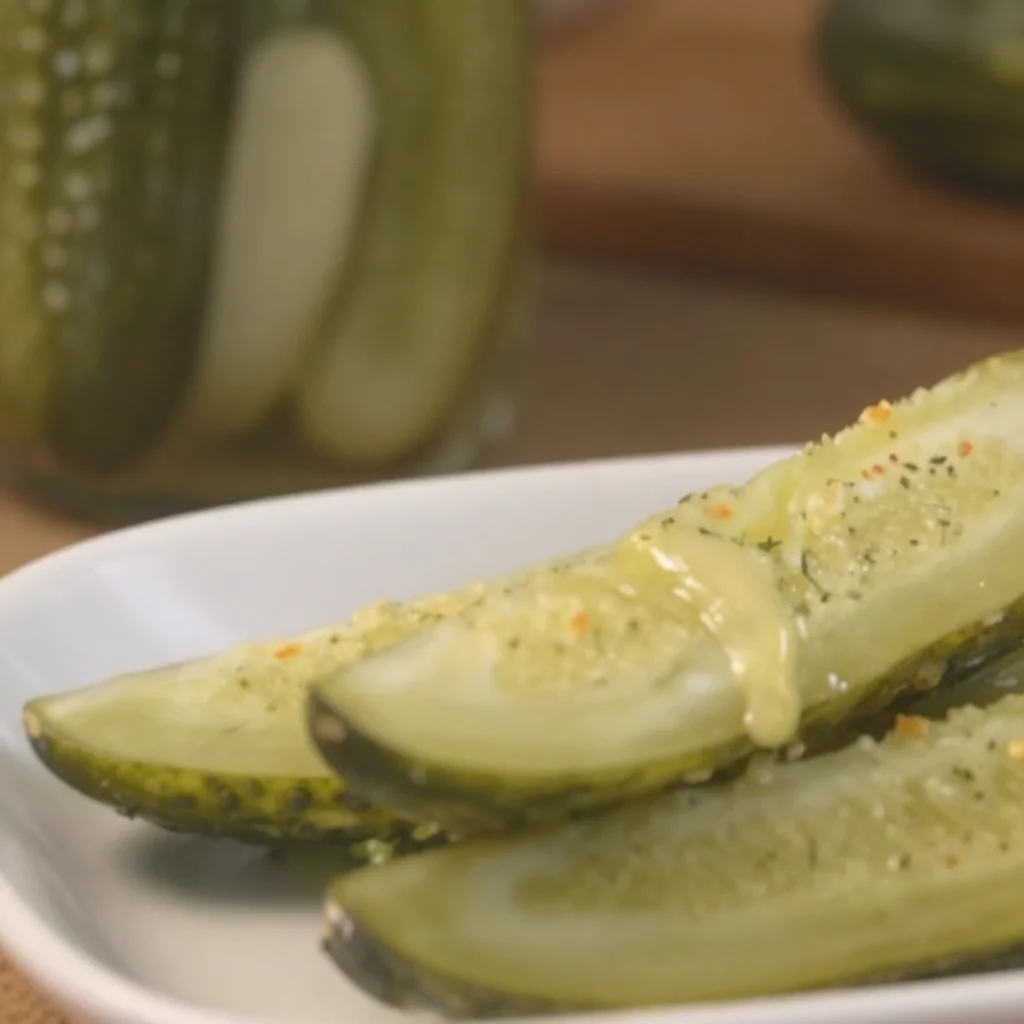
Refrigerator Dill Pickles – A Quick and Easy Recipe
Hello, fellow foodies! 🍽️ Today, we’re diving into a delightful, tangy world that’s all about those super crunchy, flavorful bites we know and love — Refrigerator Dill Pickles! Whether you’re a pickle fanatic or someone curious about making these treats at home, you’ve landed in the right spot.
Let’s get started with a recipe that’s not only easy to whip up but also bursting with flavor. It’s the perfect way to preserve those fresh cucumbers from the garden or local market, all while creating something tasty that everyone can enjoy. Are you ready? Let’s jump into it!
A Trip Down Memory Lane
Growing up, my family had a magical garden. I remember those summer days spent wandering through rows of vibrant vegetables, with everything bursting with color and fragrance. My grandma, with her sun-drenched apron and sparkling eyes, would call me over whenever we spotted ripe cucumbers ready to be picked.
One of my fondest memories is of her teaching me how to make refrigerator dill pickles. We would collect a basket of cucumbers, her treasured spices, and we’d gather around the kitchen table. She shared stories of her childhood in the countryside, when every household had their secret method of pickling. As we chopped, mixed, and tasted, I felt the warmth of those moments, and little did I know I was learning a valuable culinary skill that would stick with me for life.
Ingredients
For the Pickles
-
Cucumbers (4-6 medium-sized):
The star of the show! Choose firm cucumbers; Kirby or pickling cucumbers are ideal. If you can’t find them, any thin-skinned variety will do. -
Fresh Dill (a handful):
Fresh dill gives your pickles that classic flavor! If you don’t have fresh, dried dill will work in a pinch (use about 1 tablespoon). -
Garlic cloves (2-3, smashed):
Garlic adds amazing depth to your pickles. Feel free to add more if you love that garlicky kick! -
Water (2 cups):
Just good ol’ H2O! It helps create the brine. -
White vinegar (1 cup):
Provides that tangy punch everyone loves in pickles; apple cider vinegar can also be used for a slightly different flavor. -
Sugar (1 tablespoon):
Just a hint of sweetness balances the acidity of vinegar, enhancing the overall flavor. -
Kosher salt (1 tablespoon):
Essential for brining, kosher salt is preferable as it dissolves well and stays free of additives. -
Black peppercorns (1 teaspoon):
These little beauties add a hint of spice. You can leave them out if you prefer a more straightforward flavor. -
Mustard seeds (1 teaspoon):
A little pop of flavor! Mustard seeds add a pleasant crunch and a slightly earthy note.
Optional Add-Ins
-
Red pepper flakes (for heat):
Just a pinch will do if you want to kick up the spice level! -
Carrots or onions (for extra flavor and sweetness):
Adding these can give your pickles a unique twist!
Step-by-Step Instructions
Step 1: Prepare the Cucumbers
- Wash & Cut: Give your cucumbers a good rinse and trim off the ends. You can cut them into spears, slices, or even leave them whole, depending on your preference. Whole pickles are great for snacking, while slices are perfect for sandwiches.
Step 2: Make the Brine
-
Combine the Brine: In a medium saucepan, combine the water, white vinegar, sugar, and kosher salt.
-
Heat It Up: Place the saucepan over medium heat and stir it occasionally until the sugar and salt dissolve. This is your moment to savor the aromatic goodness wafting from the pot!
Step 3: Add the Flavors
- Add Spices: Once the brine comes to a gentle boil, remove it from the heat. Toss in the smashed garlic, fresh dill, black peppercorns, and mustard seeds. If you’re feeling adventurous, throw in those crushed red pepper flakes for a spicy touch!
Step 4: Pack the Pickles
- Jar It Up: Take a clean mason jar and start layering your cucumbers. Make sure to pack them tightly but gently, so they stay crisp. Pour the brine over the cucumbers until they’re fully submerged.
Step 5: Cool and Store
- Let It Cool: Allow the jar to cool down to room temperature; then, secure the lid and place it in the refrigerator.
Step 6: Patience is Key!
- Wait for Flavor: Let the pickles sit in the fridge for at least 24 hours, although a full 3-5 days will yield the best flavor. The longer they sit, the better they become — think of this as a little pickle prom, where they dress up and get delicious!
Serving Suggestions
When it’s finally time to enjoy your homemade refrigerator dill pickles, there are so many ways to serve them! Here are a few ideas:
-
As Snack Time Treats: Perfect for munching anytime you’re craving something crunchy and tangy.
-
Sandwich Saviors: Layer them on your favorite sandwiches or burgers for that extra crunch.
-
Charcuterie Star: They make a perfect addition to any cheese board or charcuterie platter, adding a pop of color and flavor.
-
Salads & Wraps: Sliced pickles can elevate any salad or wrap, adding that much-needed zing.
Recipe Variations
If you’re feeling adventurous or looking to change things up a bit, here are some delightful variations of this basic refrigerator dill pickle recipe:
-
Spicy Dill Pickles: For heat lovers, add jalapeño slices to your brine or increase the red pepper flakes.
-
Garlic Dill and Onion Pickles: Slice up some onions and toss them in the jar with cucumbers for an extra burst of sweetness.
-
Sweet and Spicy Pickles: Increase the sugar to 2 tablespoons and add crushed red pepper flakes for that sweet heat.
-
Herb-Infused Pickles: Try adding other fresh herbs like thyme or coriander for a unique twist.
-
Beet Pickles: For a gorgeous color and earthy flavor, add cooked, sliced beets to the jar.
Chef’s Notes
These refrigerator dill pickles are one of those recipes that evolve with every batch. Over the years, I’ve learned to tweak the brine, experiment with different herbs, and even play with fermentation (a fun project if you’re up for it!). One time, I accidentally knocked over the jar while packing it into the fridge — and instead of panicking, I let it spill into a salad. The tangy flavor was an unexpected yet delightful bomb of excitement! Who knew?
FAQs and Troubleshooting
Q: How long will my pickles last?
A: In the fridge, these beauties can last up to 2 months. If you’re dealing with an airtight seal, they even can last a bit longer!
Q: What if my pickles are too salty or not salty enough?
A: Adjust the salt to your taste. If they’re too salty, try adding more water to your brine, while under-salted pickles may need a bit more salt during the brine-making process.
Q: Can I use other vegetables for this recipe?
A: Absolutely! Carrots, radishes, and even green beans can be pickled using this method — just make sure to adjust the cooking time accordingly!
Q: What if the cucumbers float to the top when brining?
A: Use a small weight or a round piece of parchment paper to hold them down; they should be fully submerged in the brine for optimal soaking.
Nutritional Info
While I prioritize taste and simplicity over strict nutritional information, great news! Homemade pickles are low-calorie, and cucumbers provide hydration. They’re packed with vitamins K and C, making them a healthy addition to any plate.
So there you have it, friends — a delightful journey into the world of refrigerator dill pickles! With a bit of fresh produce, some aromatic spices, and a dash of love, you can create something wonderful. Now you’re ready to dive into your kitchen and embark on a pickling adventure. Remember, every jar of pickles tells a story — let yours be a tale of flavor, comfort, and joy. Happy pickling! 🥒✨
PrintRefrigerator Dill Pickles
A quick and easy recipe for crunchy, flavorful refrigerator dill pickles made with fresh cucumbers and aromatic spices.
- Prep Time: 15 minutes
- Cook Time: 10 minutes
- Total Time: 25 minutes
- Yield: 4 servings 1x
- Category: Condiment
- Method: Refrigerating
- Cuisine: American
- Diet: Vegan
Ingredients
- 4–6 medium-sized Cucumbers (firm, Kirby or pickling preferred)
- A handful of Fresh Dill (or 1 tablespoon dried dill)
- 2–3 Garlic cloves (smashed)
- 2 cups Water
- 1 cup White vinegar (or apple cider vinegar)
- 1 tablespoon Sugar
- 1 tablespoon Kosher salt
- 1 teaspoon Black peppercorns
- 1 teaspoon Mustard seeds
- Optional: Red pepper flakes (for heat)
- Optional: Carrots or onions (for extra flavor and sweetness)
Instructions
- Prepare the Cucumbers: Wash & cut the cucumbers, trimming ends and cutting as desired.
- Make the Brine: In a medium saucepan, combine water, white vinegar, sugar, and kosher salt.
- Heat It Up: Place the saucepan over medium heat, stirring until sugar and salt dissolve.
- Add the Flavors: Remove from heat, add smashed garlic, fresh dill, black peppercorns, and mustard seeds. Optionally, add crushed red pepper flakes.
- Jar It Up: Layer cucumbers in a clean mason jar and pour the brine over until fully submerged.
- Cool and Store: Let the jar cool to room temperature, then secure the lid and refrigerate.
- Wait for Flavor: Allow pickles to sit in the fridge for at least 24 hours for best flavor.
Notes
These pickles last up to 2 months in the fridge. Adjust seasoning to taste.
Nutrition
- Serving Size: 1 serving
- Calories: 50
- Sugar: 1g
- Sodium: 600mg
- Fat: 0g
- Saturated Fat: 0g
- Unsaturated Fat: 0g
- Trans Fat: 0g
- Carbohydrates: 12g
- Fiber: 2g
- Protein: 1g
- Cholesterol: 0mg
Keywords: pickles, refrigerator pickles, dill pickles, cucumber recipe, easy recipes



Leave a Reply