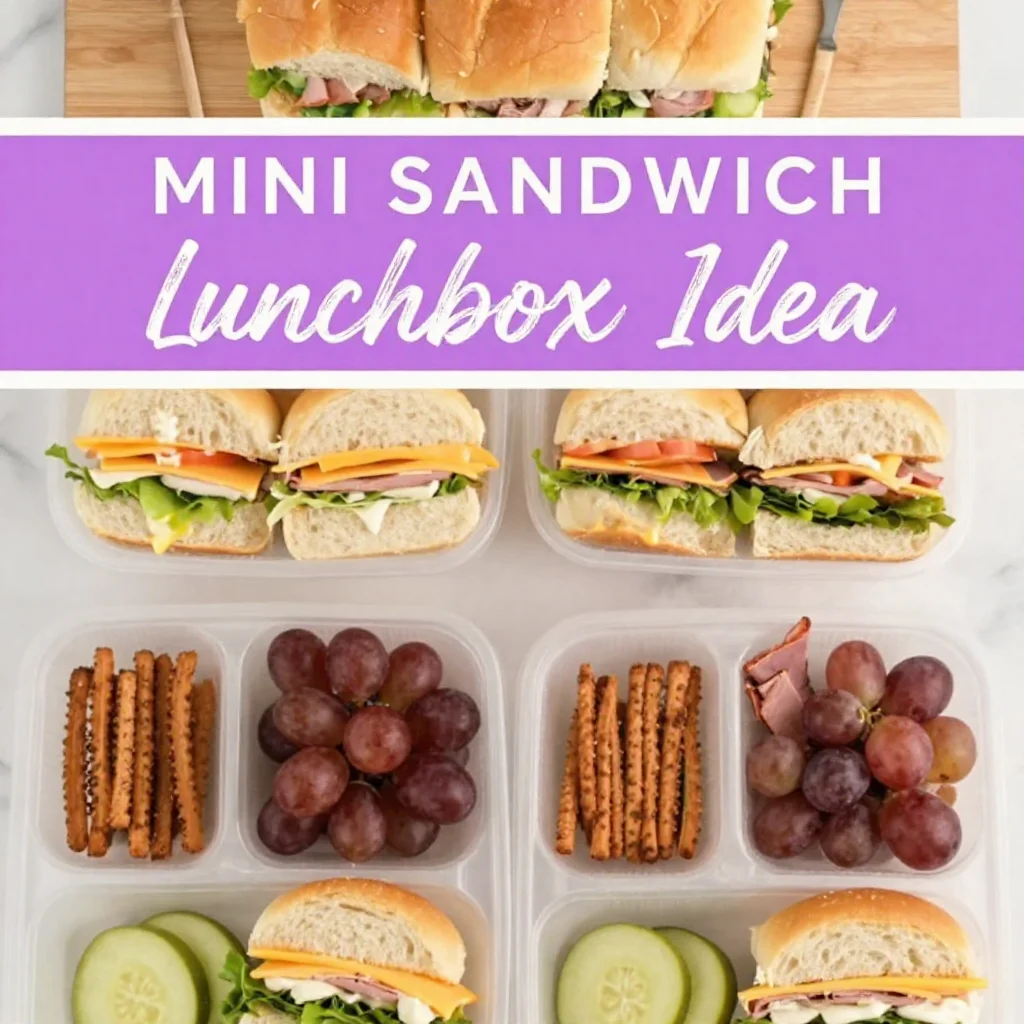
Mini Sandwich Lunchbox Idea: A Nostalgic Twist on an Old Favorite
Hey there, fellow food lovers! I’m Nina, and today I’m excited to share a simple yet delightful idea that will make your lunchboxes come alive: the Mini Sandwich Lunchbox! 🌟
If you’re like me, you probably have fond memories of school lunches filled with all sorts of goodies. One of my favorite moments was opening up my lunchbox to find a tiny sandwich packed with love and little joys—like a note from my mom or a surprise treat! So, let’s recreate that experience with our own twist!
Personal Story: The Sandwich That Sparked Joy
Growing up, my mom had this magical way of crafting the most delicious sandwiches using simple ingredients. I can still remember the scent of her homemade mayo mingling with the aroma of freshly baked bread, filling our cozy kitchen. One particular summer day, I remember helping her prepare mini sandwiches for our picnic in the park. We laid out all the ingredients and let our imaginations run wild! Sandwiches became mini canvases where our creativity thrived.
As we bit into those little creations, laughter filled the air—the epitome of comfort food and cherished memories. It’s this same spirit I want to capture and share with you today. These mini sandwiches are perfect for busy days, picnics, or a simple lunch idea that brings a taste of home wherever you go.
Ingredients
Here’s what you’ll need to create your own delightful mini sandwich lunchboxes. Feel free to mix and match based on what you love!
-
Small sandwich rolls
Perfect for little hands and perfect portions! You can substitute with dinner rolls or even whole grain options for a healthier twist. -
Deli meats (ham, turkey, or roast beef)
Choose your favorite! These meats are a great source of protein. If you’re vegetarian, try some roasted veggies or hummus instead. -
Cheese slices (cheddar, Swiss, or American)
Cheese makes every sandwich creamier! You can swap these with dairy-free options if you’re lactose intolerant. -
Lettuce
Any variety works, from crisp romaine to tender spinach. For a twist, try arugula for a peppery touch! -
Tomato slices
Juicy and refreshing! If tomatoes aren’t in season, substitute with cucumber for crunch. -
Mayonnaise or mustard
The classic spreads! For a kick, try flavored mayos or spicy mustards. -
Pickles
For that extra zing! You can use dill, sweet, or even relish. -
Snack-sized fruits (grapes, apple slices)
Fresh fruits add a sweet contrast. You can swap with berries or dried fruits depending on what you have. -
Chips or crackers
The perfect crunchy side to complement your sandwiches. Go for baked for a lighter option or homemade crackers for extra flair!
Step-by-Step Instructions
Now, let’s dive into the magic of making these mini sandwiches! Follow these steps, and you’ll have a delightful lunchbox ready in no time.
-
Prep Your Workstation
Start by gathering all your ingredients on a clean cutting board. The more organized you are, the smoother the process will be! -
Slice Your Small Rolls
Carefully cut each roll in half. You want to create the perfect little pocket for your fillings. A serrated knife works wonders for softer breads! -
Layer Your Deli Meats
Take your choice of deli meat and layer it generously on the bottom half of the roll. Don’t hold back; you want that rich protein flavor to shine! -
Add Cheese
Place a slice of cheese on top of the meat. Feel free to fold the cheese if necessary to fit nicely and ooze deliciousness when bitten into. -
Build on the Freshness
Add a couple of leaves of lettuce and a slice of tomato. It’s all about that crunch and freshness—plus a pop of color! -
Spread it Up!
Don’t forget the condiments—slather your favorite mayo or mustard on the top half of the roll. Remember, the key is to keep this simple! -
Top with Pickles
If you love that zing, now is the time to add your pickles. Just a few slices (or a dollop of relish) brings it all together. -
Seal It Up
Gently place the top half of the roll over the fillings. Give it a little squish but not too much so everything stays in place. -
Slice into Mini Sandwiches
Cut your sandwiches into quarters or halves. The smaller pieces make for adorable bites and are great for dipping! -
Pack Your Lunchbox
Arrange your little sandwiches in your lunchbox. Add in your snack-sized fruits and a handful of chips or crackers to round out the meal.
Serving Suggestions
Presentation matters! Here are a few tips on how to plate or serve these mini sandwiches:
- Use colorful bento boxes to create visually appealing layers. It makes the meal pop and feels more inviting.
- Consider wrapping each sandwich in parchment paper and tying them with twine for a rustic touch.
- Add some cute toothpicks to hold your mini sandwiches together and make them easy to grab and enjoy!
Recipe Variations
The beauty of this mini sandwich idea is its versatility! Here are a few creative twists you can explore:
-
Mediterranean Delight
Swap deli meats for sliced roasted red peppers, feta cheese, and a spread of tzatziki. Add spinach for a fresh crunch! -
Breakfast Mini Sandwiches
Use scrambled eggs as your main filling and top with cheese and avocado. This is perfect for morning meetings! -
Veggie Lovers
Create a colorful array with sliced cucumbers, bell peppers, and avocado spread. It’s nutritious and packed with flavor. -
Caprese Style
Think fresh mozzarella, basil leaves, and a drizzle of balsamic glaze. This combo brings summer freshness to your lunch! -
Sweet and Savory
Try a peanut butter and banana mini sandwich. Pair it with a sprinkle of cinnamon for a treat that’s both filling and sweet!
Chef’s Notes
You know, with food, there’s always a room for creativity! I love how this mini sandwich idea has evolved over time. I started with basic ingredients, but now I invite anyone to get adventurous in their own kitchens! Don’t be afraid to experiment with different toppings, spreads, or even breads. Once, I even made mini sandwiches with everything bagels, and it became my new obsession!
The key is to remember that cooking doesn’t have to be complicated. Just like those warm kitchens from my childhood, let your cooking space feel inviting. Your sandwiches will always taste better with good vibes and a few laughs along the way!
FAQs and Troubleshooting
You might have some questions when it comes to preparing your mini sandwich lunchbox, so let’s tackle a few common ones:
-
How do I keep my sandwiches from getting soggy?
Always add wet ingredients, like tomatoes or pickles, right before serving. Consider placing lettuce as a barrier to absorb moisture. -
Can I prepare mini sandwiches ahead of time?
Absolutely! You can make them the night before. Just keep them in the fridge in an airtight container to maintain freshness. -
What if I have leftovers?
Your mini sandwiches can last for a few days in the fridge. Just make sure you store them separately from any condiments to avoid sogginess. -
How can I make the lunchbox more filling?
Add additional snacks like nuts, yogurt, or protein bars. This way, your lunch will be both satisfying and balanced!
Nutritional Info (if applicable)
While I often focus on the simple joys of cooking rather than strict nutritional guidelines, feel free to tweak ingredients based on your dietary needs. Opting for whole grain rolls, reducing mayo, or packing in more veggies can make a meal healthier while keeping the spirit of comfort and enjoyment alive!
So there you have it! A delightful mini sandwich lunchbox idea that’s not just fun to make but also brings back memories of simpler times. Let’s celebrate the joy of cooking and the little moments that fill our lives with love and flavor. Now grab your ingredients, and let’s make those lunchboxes a fun experience for everyone! 🥪✨
PrintMini Sandwich Lunchbox Idea

A delightful mini sandwich lunchbox idea inspired by nostalgic school lunches, perfect for busy days or picnics.
- Prep Time: 10 minutes
- Cook Time: 0 minutes
- Total Time: 10 minutes
- Yield: 4 servings
- Category: Lunch
- Method: No Cooking Required
- Cuisine: American
- Diet: Vegetarian (optional substitutions available)
Ingredients
- Small sandwich rolls
- Deli meats (ham, turkey, or roast beef)
- Cheese slices (cheddar, Swiss, or American)
- Lettuce
- Tomato slices
- Mayonnaise or mustard
- Pickles
- Snack-sized fruits (grapes, apple slices)
- Chips or crackers
Instructions
- Prep Your Workstation
- Slice Your Small Rolls
- Layer Your Deli Meats
- Add Cheese
- Build on the Freshness
- Spread it Up!
- Top with Pickles
- Seal It Up
- Slice into Mini Sandwiches
- Pack Your Lunchbox
Notes
Feel free to experiment with different toppings, spreads, or breads to create your own version of the mini sandwich.
Nutrition
- Serving Size: 2 mini sandwiches
- Calories: 250
- Sugar: 3g
- Sodium: 500mg
- Fat: 10g
- Saturated Fat: 3g
- Unsaturated Fat: 5g
- Trans Fat: 0g
- Carbohydrates: 30g
- Fiber: 2g
- Protein: 15g
- Cholesterol: 25mg
Keywords: mini sandwiches, lunchbox ideas, easy lunch recipes, nostalgic food, family meals





Leave a Reply