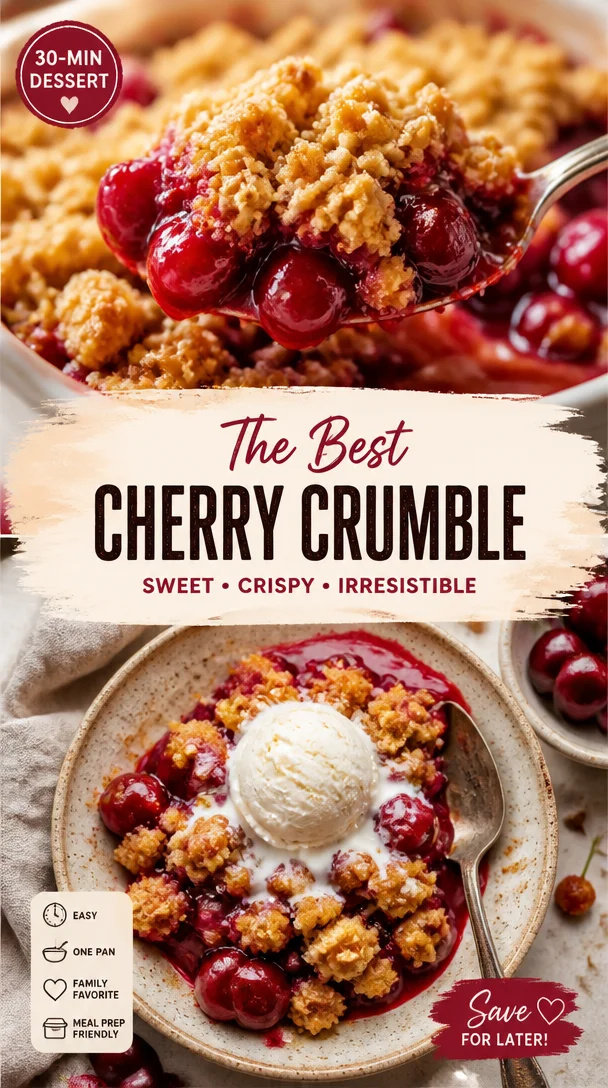
The Best Cherry Crumble: A Slice of Nostalgia & Comfort
Ah, cherry crumble! Just the thought of it brings back memories of sun-drenched summer days, warm kitchens filled with laughter, and the sweet aroma of baked cherries wafting through the air. This dish is more than just dessert; it’s a celebration of simple pleasures and cherished moments. Let me take you on a journey through my favorite cherry crumble recipe, and maybe, just maybe, we can create some new memories together!
A Sweet Slice of My Childhood
Growing up, my family had a little cherry tree in our backyard. It wasn’t much, but during the summer, it was bursting with plump, juicy cherries. I remember the thrill of climbing that tree, feeling like a tiny explorer, picking the ripest fruits to toss into a bowl for my grandma’s famous crumble. We’d sit at the kitchen table, my little fingers stained with cherry juice, as she’d share stories of her own childhood—stories of humble kitchens filled with love.
When the crumble was finally ready, the anticipation was unbearable. Every scoop was pure joy as the warm, bubbling cherries peeked through the golden, crispy topping. We would gather around the table, laughter echoing as we savored each delectable bite, often topped with a generous scoop of vanilla ice cream. It was deliciously simple—just like the best moments in life. Now, I’m excited to share that same joy with you through this easy yet scrumptious cherry crumble recipe.
Ingredients You’ll Need
Before we dive into cooking, let’s gather our ingredients. Here’s what you’ll need for the best cherry crumble:
-
2 cups sweet cherries, pitted
Fresh, sweet cherries are the star of this dish. Look for juicy, dark-red cherries for the best flavor. If cherries are out of season, frozen cherries also work—just thaw them completely and drain excess water. -
1 cup granulated sugar
This balances out the tartness of the cherries. If you prefer less sweetness, adjust according to your taste, or try substituting with coconut sugar for a caramel-like flavor. -
1 tablespoon lemon juice
A splash of lemon juice enhances the cherry flavor and adds brightness. Freshly squeezed is best, but bottled works in a pinch. -
1 cup all-purpose flour
This is for the crisp topping! For a gluten-free option, use a 1:1 gluten-free flour blend. -
1/2 cup rolled oats
They add a great texture and chewiness to the crumble. You can substitute with quick oats, but rolled oats give a better bite. -
1/2 cup brown sugar
Brown sugar provides a deeper flavor, but feel free to use all granulated sugar if that’s what you have on hand. -
1/2 cup butter, melted
Butter brings richness to the topping. You can replace it with coconut oil for a dairy-free version. -
1/2 teaspoon cinnamon
A pinch of cinnamon amps up the flavors beautifully. If you want to spice things up even more, consider adding a dash of nutmeg. -
1/4 teaspoon salt
Salt enhances all the other flavors! Don’t skip it, even in desserts. -
Ice cream for serving
Nothing beats the pairing of warm crumble and cold ice cream. Vanilla is classic, but feel free to get creative with your favorite flavors!
Step-by-Step Instructions
Alright, my friend, let’s get cooking! Follow these steps for a cherry crumble that will warm your heart and tantalize your taste buds.
Step 1: Preheat the Oven
Preheat your oven to 350°F (175°C). This is a crucial step because a preheated oven helps the crumble achieve that perfect golden-brown topping.
Step 2: Prepare the Cherry Filling
In a mixing bowl, combine the pitted cherries, granulated sugar, and lemon juice. Toss everything together until the cherries are well coated. This sweetness comes together beautifully and transforms during baking. Let it sit for about 10 minutes. This waiting time allows the cherries to release their juices, creating a lovely syrup.
Step 3: Make the Crumble Topping
In another bowl, mix together the flour, rolled oats, brown sugar, cinnamon, and salt. Then, pour in the melted butter and stir until you achieve a crumbly mixture. Use your fingers to get in there and make sure the butter is evenly distributed; this makes for the best topping!
Step 4: Assemble the Crumble
Take a baking dish (about 9×9 inches works great) and pour the cherry filling into the bottom. Spread it out evenly. Then, sprinkle the crumble mixture over the top. Make sure it’s well covered; you want that golden, crispy goodness to shine!
Step 5: Bake to Perfection
Pop your cherry crumble in the oven and bake it for about 30–35 minutes or until the topping is golden brown and the cherry juices are bubbling. The aroma will start to fill your kitchen, and trust me, you’ll have a hard time waiting!
Step 6: Serve and Savor
Once it’s out of the oven, let it cool for a few minutes (if you can). Serve it warm, preferably with a generous scoop of ice cream melting on top. You’ll want to grab a big spoon for this!
Serving Suggestions
When it comes to serving your cherry crumble, presentation is key! Use a deep dish to spoon generous servings onto individual plates. A dollop of freshly whipped cream or a drizzle of caramel can elevate it even further! You could even garnish with a sprig of mint for a touch of color.
Recipe Variations
-
Berry Blend Crumble: Mix in some blueberries or raspberries for a berry medley! The tart notes complement the sweetness of the cherries beautifully.
-
Nutty Addition: Add chopped nuts like almonds or pecans to the topping for an extra crunch and depth of flavor.
-
Coconut Twist: Swap some flour for shredded coconut in the topping for a tropical vibe!
-
Spiced Up Crumble: Add a teaspoon of pumpkin spice to the crumble mixture for a fall-flavored twist.
-
Savory Surprise: Try adding a pinch of sea salt to the cherry filling to enhance the sweetness and give it a gourmet edge.
Chef’s Notes
Over the years, this recipe has seen its fair share of love and tweaks. For instance, I once experimented with adding a splash of bourbon to the cherry filling (a tip from my wonderful neighbor) which added an unexpected depth—definitely worth a try for adults! Cooking, like life, is about experimenting and adding your own touch to things.
And don’t be afraid to get messy! Cooking is often an adventure, and I’ve had my fair share of flour explosions, cherry juice stains on my favorite shirt, and burned edges. But it’s all part of the journey!
FAQs and Troubleshooting
1. What if my crumble topping isn’t crispy enough?
Make sure you have enough butter in your crumble mixture, and don’t be shy about letting it bake until golden. If you’re unsure, a few extra minutes in the oven can make a big difference!
2. Can I use frozen cherries?
Absolutely! Just be sure to thaw and drain them well before using. Frozen fruits release more juice, so a little extra baking time might be needed.
3. How do I store leftovers?
Cover it tightly and keep it in the fridge for up to three days. You can warm it up in the oven for a few minutes before serving again—it tastes just as great!
4. Can I freeze cherry crumble?
Yes! You can freeze the unbaked crumble for up to three months. Just assemble the cherry filling and topping, then wrap tightly. When ready to bake, no need to thaw—just bake it a little longer!
Nutritional Info (Optional)
This cherry crumble recipe serves about 8 and contains an approximate nutritional breakdown of:
- Calories: 320
- Total Fat: 15g
- Saturated Fat: 8g
- Cholesterol: 35mg
- Sodium: 140mg
- Total Carbohydrates: 45g
- Dietary Fiber: 2g
- Sugars: 20g
- Protein: 2g
Remember, these values can vary based on specific ingredients used.
Let’s Bake Together!
I hope you feel inspired to try this cherry crumble recipe and create your own delicious memories. Cooking is an opportunity to connect with our roots, celebrate traditions, and most importantly, share joyful moments around the table.
So, grab your apron and let’s get to baking. I can’t wait to hear about your cherry crumble adventures—what stories will you create in your own kitchen?
Let’s keep that warm, comforting feeling alive with every bite!
Happy baking! 🍒✨
PrintThe Best Cherry Crumble

A nostalgic cherry crumble recipe celebrating simple pleasures and cherished moments, perfect for warm summer days.
- Prep Time: 15 minutes
- Cook Time: 35 minutes
- Total Time: 50 minutes
- Yield: 8 servings 1x
- Category: Dessert
- Method: Baking
- Cuisine: American
- Diet: Vegetarian
Ingredients
- 2 cups sweet cherries, pitted
- 1 cup granulated sugar
- 1 tablespoon lemon juice
- 1 cup all-purpose flour
- 1/2 cup rolled oats
- 1/2 cup brown sugar
- 1/2 cup butter, melted
- 1/2 teaspoon cinnamon
- 1/4 teaspoon salt
- Ice cream for serving
Instructions
- Preheat your oven to 350°F (175°C).
- Combine the pitted cherries, granulated sugar, and lemon juice in a mixing bowl, tossing to coat. Let it sit for 10 minutes.
- Mix together the flour, rolled oats, brown sugar, cinnamon, and salt in another bowl. Pour in the melted butter and stir until crumbly.
- Pour the cherry filling into a baking dish and spread it. Sprinkle the crumble mixture on top.
- Bake for 30–35 minutes until the topping is golden brown and the cherry juices are bubbling.
- Serve warm, topped with ice cream.
Notes
For a gluten-free option, use a 1:1 gluten-free flour blend. You can freeze the unbaked crumble for up to three months.
Nutrition
- Serving Size: 1 serving
- Calories: 320
- Sugar: 20g
- Sodium: 140mg
- Fat: 15g
- Saturated Fat: 8g
- Unsaturated Fat: 5g
- Trans Fat: 0g
- Carbohydrates: 45g
- Fiber: 2g
- Protein: 2g
- Cholesterol: 35mg
Keywords: cherry crumble, dessert, summer recipe, nostalgic dessert, easy baking, family recipe


Leave a Reply